Showing posts with label dullcote. Show all posts

Monday, November 07, 2022

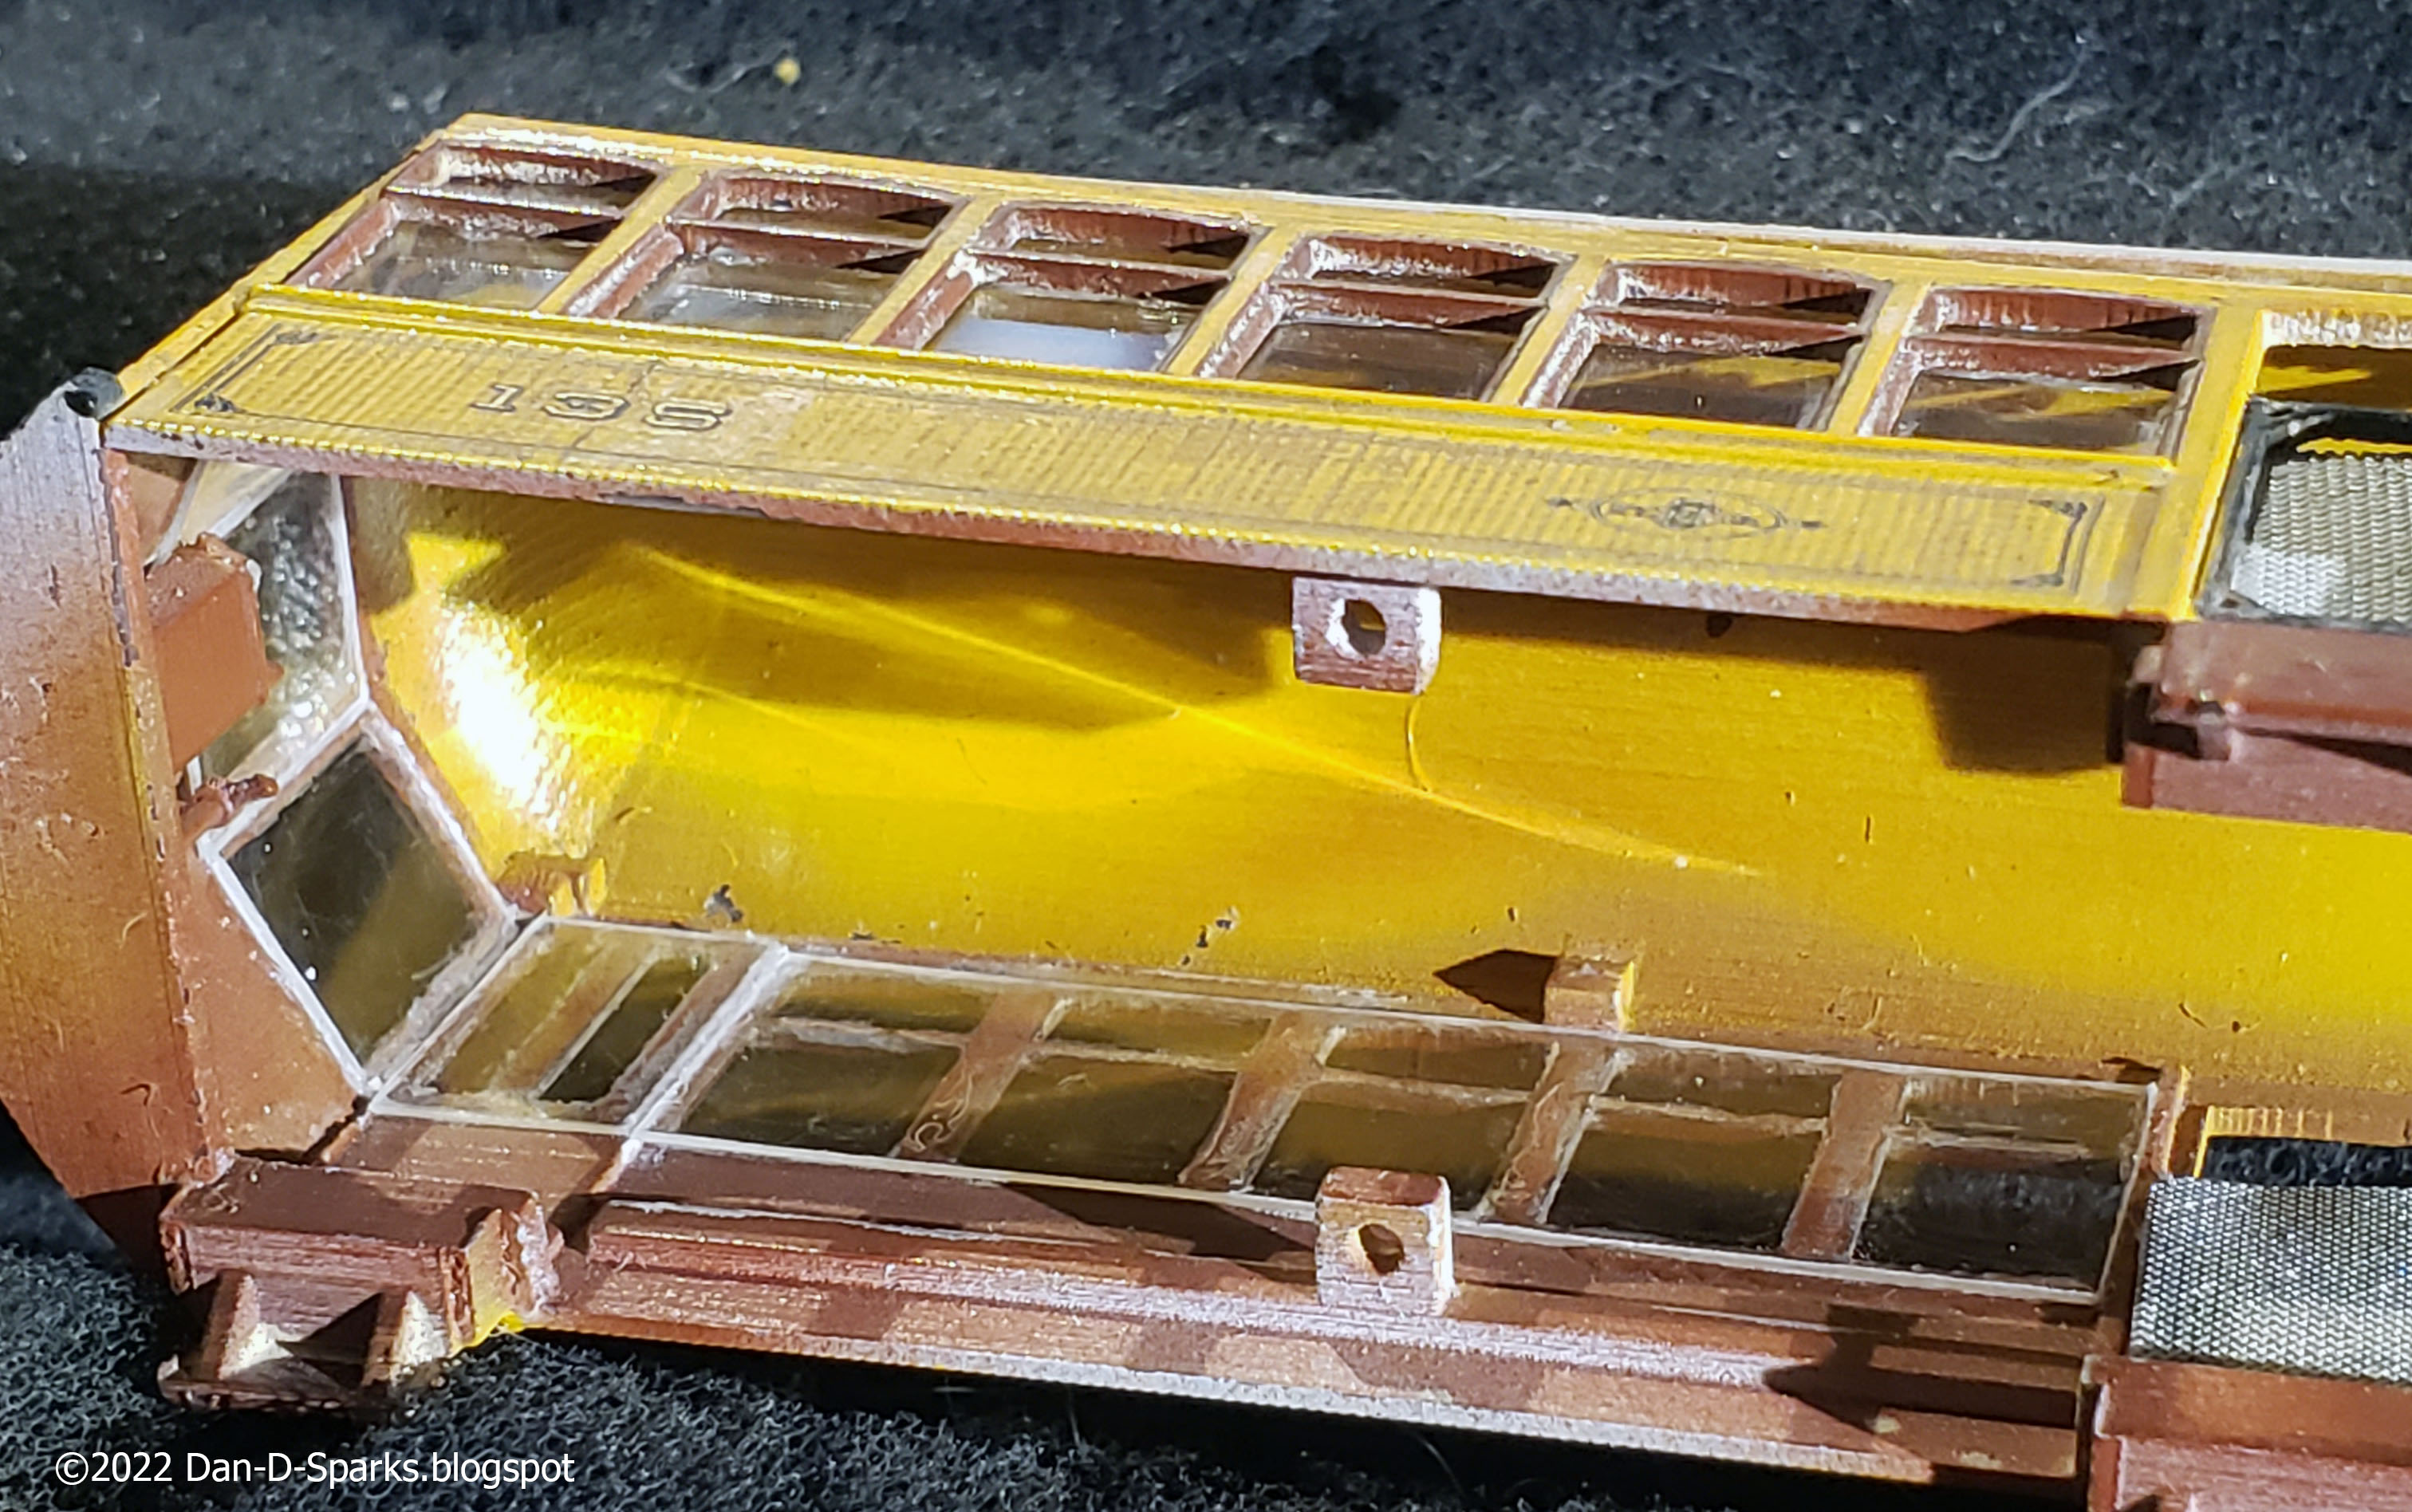
#135 ~ Glassed & Weathered

Adding Window Glass plus Dust and Grime.

An attempt has been made to make the car look like the daily conveyor of the public over the dry, dusty, unpaved streets of early 20th century San Diego.


The car was weathered with Bragdon Weathering Powders.  I managed to go a little more overboard with weathering than I intended to but, the car is looking like the hard working wooden cars it's meant to represent.  Also, the SDERy trolley company didn't seem to wash their cars much, so I'm not too far off.

After sealing the weathering with DullCote, the clear styrene was installed.  Individual panels for the end windows and the door, and a continuous piece for the side windows. The clear styrene was glued on with canopy glue.

Looking at historical photos of these cars I get the overall impression that they were pretty grimy. So I don't think that I'm that far off.

Yes sir!
I'm not that for off.

Dandy

Monday, December 06, 2010

Niles Project ~ Applying Decals to #107

Now that the decals are made, I'm going to try a different technique of applying the decals so as to help them settle more easily into the wood slats.


Remember, decals have to be applied onto glossy surfaces. Since I painted #107 with Floquil paints, which dry dead flat, a coat of gloss has to be sprayed on to where the decals are going to go. AND the decals need to be sealed as well. So while I have the gloss in the airbrush, I'll coat the decals with it as well.


Okay, Floquil Hi Gloss has been applied to the decals and #107. While they dry let me recap the decaling of #105...

With #105 the decals didn't want to settle into the deep wood slats. Eventually, the parts of the decal with air under it will dry out and flake off. So I'll probably loose that part of the "5", and the 3D drop shadow of the "0", and the rose buds on the corner flourish of the pin stripping, etc.  So after discussing the matter with Don Ball, it was concluded that it was difficult for the air to escape from under the vast expanse of the decal paper. So he suggested cutting the decals closer to the printing:


With a new, sharp eXacto blade, I cut out the negative areas of the decals that didn't contain any printing. But while applying the decals, I had a horrible problems with the decals curling! I wasn't able to get any photos since I was frantically trying to get the decals to lay down flat and straight before they set. Some decals got so distorted that I had to scrape them off and print new ones. Now its quite possible that this happened because the decal paper I used is over a year old. Fresh paper might behave better, but I don't know for sure. But I'll be sure to start with fresh decal paper next time since decal paper doesn't cost and arm or a leg.


Decaled and sealed with Dull Cote. Over all it looks good! But under closer inspection, the pinstripes are a bit wiggly, air bubbles can be seen here and there, and the edges of the decals are visible. Hopefully, some of these imperfections will be hidden by a bit of weathering. But over all, its looking good. Yes sir! Looking good!

Dandy

Monday, September 27, 2010

Niles Project ~ Slappin' Some Decals onto #105

Applying Decals to Niles Combination Car# 105


The last we left off, #105 has been painted and then a layer of Floquil Hi-Gloss applied to where the decals are going to be applied.


Fortunately there isn't any white or silver lettering involved, so I was able to print the decals with my home printer. My printer is an ink jet, so I purchased some decal paper specifically for ink jet printers.

These Niles cars are a little different from the Birney car in that these cars have "wood" slats. The decal doesn't want to settle down into all the grooves. It did in the groove to the left of the "0" (above photo) but that's about it. Eventually (as I understand it) the decal over those grooves will dry up and flake off. The only solution I could think of is to coat the decal with Micro Sol and used a tiny screwdriver to stretch the decal into the grooves. but I could only work the decal for a short time before it gets damaged. 

 This method proved to be somewhat successful, but only to a degree.The decal is conforming to the groves a little better, but a lot of air is still trapped in there. So I contacted my friend Don Ball for his advise...

Don Ball would know what to do, he is modeling the 1895 Stockton & Copperopolis Railroad which is stocked full of finely pinstriped and scroll lettered locomotives and wooden passenger cars. He recommended that instead of cutting the decal as one large piece, rather, cut the decals closer to the pinstripes and lettering and add them separately so that the air is better able to escape out from underneath the decals.  So its too late for #105, but not for #107 which is next in line for decals.


Not bad overall though. A downright fancy looking 1908 streetcar. After the decals are good and dry, I'll spray the car with a good coat of Testors Dullcote. Not only does this seal the decals, but it readies the car for weathering. So tune in in two weeks and we'll get this car good and dirty. Yes sir! Good and dirty!

Dandy

Saturday, May 09, 2009

Birney Project ~ Stickin' On the Stickers

Now that the Decals are made, it's time to stick 'em on.

Before anything else, seal the decals with a spray coat so the ink won't smear in the application process. Folks use clear Krylon, Dullcote, etc. Since the Birney is painted with Scalecoat paint, I sealed the decals by spraying them with Scalecoat Gloss. Let dry 24 hours.

It has been a while since I applied decals to a model, let alone decals with pin striping and that need such precision placement as these do. So, to gain some confidence I'm going take some decals that didn't print out all that well when I was trying out different settings on my printer, and use them to practice with.

Shown above is my handy "big ol' hunk of iron" that comes in very handy as a weight for various things. As you can see, I even used it to try out my SDERy Mission Yellow recipe on before I applied it to the model. Now its a perfect candidate to try the decals on! I'm using Microscales Micro Set and Micro Sol to help with the application proccess. Micro Set helps set the decals in place and Micro Sol softens the decals so that they will conform to irregular surfaces such as brick detail, plank detail, or in my case... rivets. The bottom decal was applied first. I was very pleased with it until I discovered that while smoothing it out, I had also stretched it to about 125% of its original size! Thinking I'm not supposed to smooth it out, I applied the second (top) decal and just let it dry on its own, thinking it will just tighten up and lay flat. But no, even though it didn't stretch as bad, its all wiggly. So I sent a frantic email to my good friend and fantastic modeler, Don Ball. He told me his technique for applying decals, which I followed very carefully. Turns out, I was not only using too much Set and Sol, I was using WAY TOO MUCH Set and Sol.

Following Don's instructions, I first dipped the decal into clean drinking water and set it aside to let the moisture from it loosen the decal. While that was happening, I took a much smaller brush this time and applied just enough Micro Sol to moisten the surface of the area of the car to be decaled. The decal was then slid off its backing right on to the moist, slippery surface. I used the brush sparingly dipped in Micro Set again to help position and smooth out the decal., using a small piece of tissue to blot up any excess. Once the decal is in place, I let it dry completely!

Now that everything is dry and stuck in place but good, now I can apply the Micro Sol (the hot stuff, that's why the bottle is red). But only to where its needed! In my case, right over the rivets. I applied small amounts over the rivets and let it soften things a little, using the brush to help conform the decal around the rivets. Not too much though, don't want to rip the decal. Let it dry!

Keep repeating: Moisten with Micro Sol only where needed, nudge, and let dry, as many times nessessary until desired results are achieved. When everything is in place and perfectly dry, I seal the decals by spraying the car with gloss coat.

For the dash signs, I cut some shim brass to size. I wanted to use styrene, but it don't come that thin. I painted the sign the trim brown color. After it was dry, I applied the decals to it and sealed them with gloss. Later I will glue it to the front of the car, after the weathering is done.

It's always amazing to me what a difference lettering and striping makes to a model. I think its looking sharp in its new pin striped suit. Yessir! Lookin' real sharp in it's new pinstriped suit!

Dandy