Showing posts with label hold down hooks. Show all posts

Monday, December 05, 2022

#135 ~ Precision Instrument

 Trolley Poles and Hold Down Hooks

Fabricating some trolley pole hold down hooks.

Last time I already installed the trolley pole bushings but then I goofed and installed the weights before installing the trolley pole hold down hooks.  

But looking at the prototype hold down hooks, I may have not goofed at all! I think I can work with this.

For the Trolley Poles I used Miniatures by Eric Traditional Trolley Poles HTP4.

The hold down hooks are fabricated using some .015x.042 Brass Flat Bar from Detail Associates.

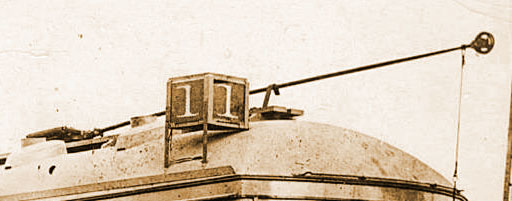
The hold down hooks need to be at a height so that the trolley poles are horizontal when in the stowed position.

The .015x.042 brass bars slipped between the roof and running boards nice and snug.  A little epoxy will hold them in place.

I think I got the angle just right!  I painted the hold down hooks black and glued them in.

Ooh! Nice!  #135 is looking like the precision instrument that its meant to be!

Yes sir!
The precision instrument its meant to be!

Dandy

Monday, May 23, 2011

To Trolley Pole Reverse Or Not To Trolley Pole Reverse.

That is the question.
Exploring the two methods of wiring a trolley. The "cool" method or the more practical method.

(NOTE: This post was written when when the layouts were wired for standard DC (Direct Current). But with the advent of DCC (Digital Command Control) Trolley Pole Reverse is no longer an issue. Cars are wired for "Trolley Pole Forward" as shown below. -Dandy 2020)

The question we get the most when the Southern California Traction Club displays its modules is "are the trolleys getting their power from the wires?". Not only are the guests pleased when we inform them that indeed they are, but we will also do a little demonstration of "Trolley Pole Reverse" that guests take a delight in. It doesn't take long for a trolley to come by. So I'll put my finger lightly under the overhead wire so that as the car comes by, the pole will disengage the wire and the car will roll to a stop. I'll stow that pole under the hold down hook and explain that "one pole is wired to one pole of the motor, and the other pole is wired to the other pole of the motor". Lifting the opposite pole to the wire, the car jumps to life and continues on its way ~ in the opposite direction. Guests are thoroughly impressed.


But lately we at the club have been discussing reliability. As all model railroaders know, the toughest electrical continuity to maintain is the contact between rail and wheel. The slightest obstruction will cause a stall. Stalls are no fun. With traction modeling not only is that problem made double with the tiny contact between the trolley shoe and overhead wire but triple so with the just as critical contact between the stowed pole and the hold down hook.

When a car stalls, its usually the tiny connection between the trolley shoe and overhead that's been compromised. A gentle tap of the overhead is usually enough to reengage to shoe to the wire. If that doesn't work then its probably the wheels, nudging the car forward a tad should fix that. If that doesn't work then a wiggle to the front pole might invigorate that contact. If that doesn't work... well, you get the idea. It gets a little frustrating. So eliminating weak spots like these just makes things run a little smoother. But eliminating the contact between the rails and overhead isn't feasible. But that connection between pole and hold down hook can be addressed.


With Trolley Pole Reverse, one trolley pole is wired to one pole of the motor while the other trolley pole is wired to the other pole of the motor. Whichever pole is in contact with the overhead will supply the positive charge to the motor. The other pole is in contact with the hold down hook completing the circuit by providing ground. This method requires good spring tension to press the pole up against the hold down hook and a clean connection between the pole and hold down hook. A little contact cleaner fluid is helpful here as well.


Though I've never heard it called this, I'm calling this method "Trolley Pole Forward", as opposed to Trolley Pole Reverse. This method eliminates the contact between the pole and hold down hook, providing a bit more reliable operation. This is particularly useful in a DCC environment where a car can be reversed without reversing the polarity of the rails and overhead. We simply tell the decoder to run the car the other way.

I think it all comes down to preference. On a point to point operation, Trolley Pole Reverse might work best. For a "roundy roundy" operation, Trolley Pole Forward might be preferred. On a DC layout, I think Reverse could be the way to go. On a DCC layout, Forward could be it. I don't know. But I think once my layout gets rolling, time will tell which I prefer. Yes sir! Time will tell!

Dandy

(Edit- Time has told! Yes- on a DC layout, "Reverse" is a good way to go. On a DCC layout "Forward" is the way to go. -Dandy 2020.)

Monday, October 19, 2009

Birney Project ~ Hold Down Hooks

Fabricating New Trolley Pole Hold Down Hooks For The Birney.

Trolley poles pointing downward is a bad thing. The hold down hooks are too short. So I'm going to fabricate some new hooks that are taller and more prototypically correct.


Using a cutoff disk on a Dremel, I cut off the old hooks.

Since the trolley poles are wired to the leads of the motor, the hooks need to conduct electricity from the brass body of the car to the pole. So I had to remove paint from where the hooks will be soldered to the car.

To fabricate the hold down hooks, I started with .010" x .030" brass bar stock folded in half.

Using a nail (I found a nail that was the same diameter of the old hook loop) I looped the brass around getting a nice curve by using pliers and a screwdriver to work the brass into shape.

Add a reverse curve in the brass so that the apex of the loop is in line with the main shaft of the hook. Solder only the loop, the reverse curve and part of the neck together.

Then bend the legs out and fold in the feet that will be soldered to the base. The hook assembly is now done.

Solder the hook assembly to the roof boards and trim the feet. Give it a tug to confirm a good connection. Now its time to paint the hooks and while I'm at it, I'm going to right a wrong...
Roof boards were never the same color as the roof. Roofs were usually of canvas or thin sheet metal, so you don't want to step on it or you'll fall right through or bend the heck out of it. So roof boards were installed so that workmen maintaining the cars could stand on the roof without damaging it. They were usually made of wood and were painted a contrasting color so the workmen could see where to step out of their peripheral vision. My hands are pretty steady, but not at this tiny scale. So I masked off around the boards.
Brushed on some Scalecoat Roof Brown on the boards and painted the hooks black. Some weathering will kill the shine on the boards.

Now that's more like it! The car looks much better and the horizontal poles are getting a much better electrical contact with the hooks now. Storing the car with poles on help keep the connection from oxidizing. Got to do everything you can to keep good electrical connections throughout if you want to keep them doggies rollin'. Yes sir! Keep them doggies rollin'!

Dandy