Read the Free Trolleyville Times Monthly for the Latest News on Prototype and Model Traction!

Monday, December 29, 2008

Birney Project ~ Car Body

You know, if this project works out and the Birney performs well on the layout, I would most likely want to add more to the roster. But this time, instead of looking for an eBay basket case Birney, I think I would rather go with this resin Birney body offered by Miniatures by Eric. I haven’t seen these in person, but if you have, let me know what you think.

Seems to me that a body shell would be much more fitting for the complete overhaul that’s required on this project. And if Hollywood Foundry can work out the bugs and get its Birney mechanism released, then this project would be a definite go! Then I can build up a nice fleet of Birneys. Yessir! A nice fleet of Birneys!

Dandy

Monday, December 15, 2008

Birney Project ~ Painting and Detailing the Seats

Now that the seat assemblies for the Birney are built, it’s time to paint and detail them.

The trim color on SDERy equipment is brown, so I’m going to try out Scalecoat Roof Brown on the seats to see if it’s a good color for the trim.


Scalecoat is a high gloss paint, great for decals, not so much for seats. So I weathered the seats with some weathering chalk and then sprayed the seats with Testors Dullcoat to kill the shine. The seats on the left are freshly painted with Scalecoat, the seats on the right have been weathered and sprayed. After they have dried thoroughly, I can glue the figures in place.


I had to cut and file the feet off of the figures, not a natural thing to do! I also had to file some of the material off of their butts to get them to seat properly. None of this will been seen when the figures are riding in the trolley.


Once the figures are seated properly, I super glued them into place. The motorman I was able to leave fully intact since he sits higher and doesn’t have to deal with the mounting bar. Which is good because he is fully visible through the doors.


There! How’s that! Don’t quite notice the motor as much, hmmm? Yessir! Don’t quite notice the motor as much!

Dandy

Monday, December 01, 2008

Birney Project ~ Installing the Seats

Now comes the question "which direction is the trolley going?". Almost all trolleys are double ended. When they reach the end of the line the conductor simply walks down the isle and flops over the seat backs so that the seats are now facing the other direction, no need to turn the trolley.

But thats impractical on a model like this. If I permanently attach the seats to the trolley, then the car will have a definite forward / back. I'm going to try to mount the seats into an assembly that can be reversed from time to time, to help the motor maintain even wear. So I soldiered the seats to a bar of brass.

Notches are filed in the bar to clear the motor bolsters mentioned in the previous post. Also, a notch was carved behind the motorman's seat to clear the screw. These notches also help keep the seat assembly in place and prevents it from sliding around inside the car.


Because the floor of the model is higher than on the prototype, there isn't room enough for the legs of the seats. (Or for the passengers for that matter!!! Preiser actually offers plenty of legless passenger figures because this is a common occurrence with models!). So mounting the seats to a bar works out just fine.


I tried snapping an interior shot so that you can see how the seats fit around the motor. Difficult shot to get. I tried.


Here is how the seats look from the outside. Each seat will have a figure or two riding in them, filling the window and hopefully, distracting from the big ol' motor inside. Works for me! Yessir! Works for me!

Dandy

Monday, November 24, 2008

Birney Project ~ Fabricating the Seats

Despite the Bullant motor/drive mechanisms tiny size, it's still huge inside the Birneys interior, taking an unfortunate toll on the models see-through quality as seen in the prototype photo. There are a couple of options as to how to hide the motor. One common practice is to use frosted glass in the windows. But I'm going to keep the glass clear and try to distract the viewers attention from the motor by surrounding it with interesting details. Lots of colorful passengers looking out the windows will hopefully help the black motor disappear into the shadows.

First off, I measured the motor to determine how much of the interior its going to eat up. Birneys came in different sizes and configurations, but generally they were 8' wide with 36" seats and a 24" isle. As you can see in the blueprint I drew, the motor takes up the whole isle and half the seats. But thats all right. There is enough seat left to seat passengers on, thus distracting from the motor!


I'm going to make the seats from brass stock. Styrene would be a lot easier and faster to work with, but brass will add heft to the model, helping with performance. I started with a 1/4" x .032" brass bar. I lightly filed the sharp corners to round them a bit, to make the seat back appear plush.

NorthWest Short Lines press bending break "The Bender" is used to bend the brass. This works quiet well, especially when used correctly! I made most of the seats the hard way until I realized I was doing it wrong. Note to self: review instructions.

The bend should be less than 90 degrees, to give the seat that reclining look.


Then cut the seat from the brass stock. I didn't bother rounding the seat cushion, it'll never be seen. Repeat above steps until enough seats are made.

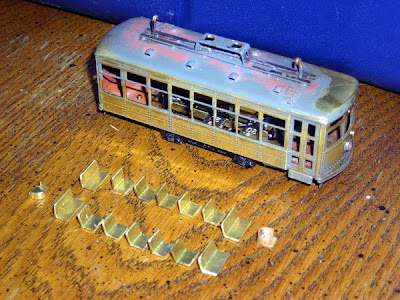
The front seats and back seats are clear of the motor, so I built them full size. This should help rap details around the motor. I fabricated the motorman's seats from more brass bar and tube stock. These seats I left pretty rough. I didn't want to fuss with detail that will never be seen. Notice also that in the second window you can see a screw protruding from the floor about where the motorman's chair is going to be. Also, the motor bolsters (also seen through the windows, they have the number "20" embossed on them) also protrude from the floor. These are a problem. I'm going to have to work the seats around these. Yessir! Gonna have to work around these!

Dandy

Monday, November 17, 2008

Birney Project ~ Darn It All To Heck!!!

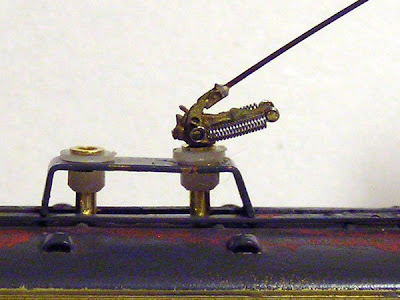
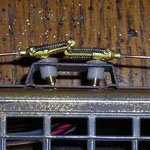
The close proximity of the two trolley pole mounting holes are causing the trolley pole bases to interfere with each other. As usual, I found this out the hard way.

So I found these poles where the base is facing the opposite direction! Perfect! Problem solved.


Whoops! Somethin' wrong here. These poles were designed for PCC cars and I think that the roof of PCCs curve down where the poles attach, angling the pole. So the upward angle of the base (which would be level on a PCC) prevents the pole from laying flat on the Birney car. It can’t reach the hook! Dang it! So it’s back to finding a suitable pole. This can’t continue for too long because poles are expensive!!! (I can’t return these poles because I had to trim the bushings to fit the Birney.). These setbacks are really blowing my modeling budget. Dang it! Yessir! Dang it all the heck!!!


Monday, November 10, 2008

Birney's In The Movies!

It's Birney mania I tells ya! Birney trolleys are now showing up in a theater near you!

Changeling, Directed by Clint Eastwood, with Angelina Jolie and John Malkovich, out in theaters now, features Birney trolleys throughout the movie!


I hope I don't spoil it for you but, the trolley is actually a replica riding on rubber tires! The same technique was used on “Who Framed Roger Rabbit” that also featured Pacific Electric streetcars. in early Los Angeles.

Here is a rubber tired Roger Rabbit trolley parked on the side of the road waiting for its close-up.

Rubber tires because tracks are long gone from the streets of LA. Todays trolleys run on separate right-of-ways. So production crews have to lay "track" for the movies. Bill Volkmer photos.

The Changeling production crew built their Birney based on the design of an authentic surviving Pacific Electric birney car #331 and sister car #332, now residing at the Orange Empire Trolley Museum in Perris, California.   I'm afraid I didn't have my facts straight dear followers. My sincerest apologies. The car used in the shoot is in fact an actual Birney! According to John Smatlak's report at http://groups.yahoo.com/group/TrolleysCA/message/8362:
The Birney car wasn't from OERM, but rather "Omaha Lincoln & Beatrice #4, (Brill 1926, order #21021, info from Frank Hicks). It's on rubber tires for filming of The Changeling at the San Bernardino depot (seen in the background) and at other locales. OERM loaned seats and other interior furnishings for the car, along with the complete mainline steam train mentioned previously."


During location shooting in Pasadena, local resident David Johnson was on hand to take these videos of the “trolley” providing “background” for a shot.


With the movies fantastic period costumes and authentic automobiles, and with a little Hollywood movie magic, one could escape reality for a couple hours and enjoy a nostalgic trolley ride through 1920s Los Angeles on a Birney car. Yessir! A nostalgic ride on a Birney car!

Dandy


Monday, November 03, 2008

Birney Project ~ Darn it!

With the motor installed, the next step is to get it hooked-up electrisicle wise. That means installing the new trolley poles.

The insulating bushings that came with the poles are too big for the existing holes in the Birney. So I had to drill them out so the bushings would fit. Easy enough.

Then I popped in the poles and wouldn't you know it... the trolley pole bases are too long! They are overlapping each other! Darn it! Ah- Dang it! I had no way of knowing beforehand. Aw shoot! And I drilled out the mounting holes! Oh phooie! Now I have to order different poles! Dang it man, how long is that gonna take?! Darn it! Darn it! Darn it!


Yessir! Darn it!

Monday, October 20, 2008

Birney Project ~ Installing the Bullant

Easier said than done. Somehow I have to install the new Bullant drive mechanism where the old motor is now.

I have no idea how I'm going to do this. So, as usual, I'm just going to have to take it one step at a time. Yessir! One step at a time.
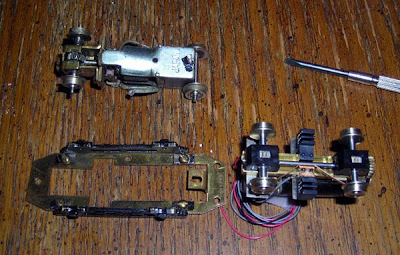
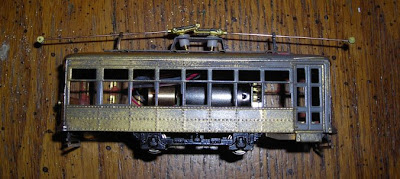
The first order of business is to remove the old motor and see how the Bullant relates to the frame. First off, its apparent that the Bullant will not slip right in. The wheels prevent dropping in the mechanism down from the top, and the bolsters prevent it from coming up from the bottom. So somethings got to give.

Looks like I have four choices at how to do this. 1- build a new frame, as Bruce Battles of Menlo Park, CA seems to have done with this single truck streetcar ( I don't know Bruce or how to contact him, If anyone knows this guy, I sure would like to correspond with him about his modeling, and probably ask permission to use above photo ~ eep!). Or 2- modify the existing frame. Or 3- mount the Bullant directly to the Birney shell. Or 4 – glue the truck side-frames to the polystyrene side-frame supports on the Bullant, and then mount the side-frames to the trolley body.

As you can (barely) make out in this photo, the mounting bolsters of the Bullant are actually higher than the top of the chassis frame. So options 3 and 4 are out. But if I could just slide in the Bullant into the chassis frame, then the mounting bolsters could be mounted from the top.
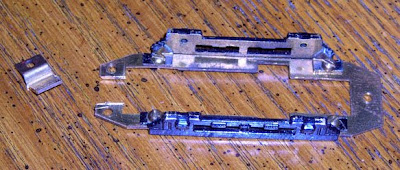
So as you can see, I decided to modify the frame (Option 2). If I mess it up, then I'll simply build a new frame (Option 1). I cut a piece of the frame out so that the Bullant could just slide in. This kind of compromises the integrity of the frame, but note that the mounting holes are on either side of the cut, so when bolted in place on the Birney body, things will be rigid again.
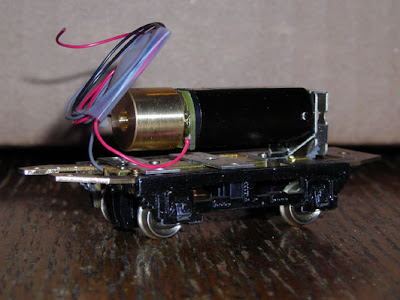
And sure enough, the Bullant slipped right in!
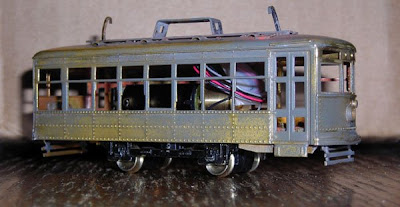
Whoops! Things are sitting kind of high. The Birney body needs to sit lower so that the center of the side-frames are equal to the center of the wheels. More fiddling needs to be done. But we're getting there Huh? The Bullant is in there!


Spacers between the frame and the bolsters will raise the Bullant / lower the Birney body, so I cut some from brass stock and soldered them to the frame. Now this is funny; I wanted to screw the Bullant to the spacers so the Bullant could be removed from the frame. But while I was trying to center the mounting holes so I could mark their location for drilling, things kept sliding around. So I temporarily super glued the Bullant in place. Well, the super glue has worked so well, I think I'll just go with it for a while. Yessir! Just go with it for a while!


I did it! I actually pulled it off! The Bullant is in there, and its in there solid! I'm just so proud of myself. I wish I could test it. What I need to do now is build a test track. Yessir! I need to build a test track!

Dandy

Monday, October 06, 2008

Birney Project ~ BullAnt Drive Mechanism

Oh it’s always such a happy occasion to see the UPS truck pull up outside. And today was no exception. Today he delivered to me the long awaited BullAnt Drive Mechanism I ordered from Hollywood Foundry Railway Products. You know what that means... Time to rip open the Birney box!

Hollywood Foundry (of Australia of all places) builds these finely crafted mechanisms built to perform and last. So I had them build one for my Ken Kidder Birney.

I say that I “had it built” because you can order you mechanism built to your specifications.

The specifications I used for the Birney car drive mechanism are: 28mm wheelbase, 26” wheels, Mashima 1024 motor, a 31:1 gearbox reduction ratio, and wired for common wheels and trolley pole reversing.

Time to build up the momentum on this project again and get it moving full steam ahead. Yessir! Full steam ahead!

Monday, September 22, 2008

2nd Dandyversary

Today is the second anniversary of this Dandy little blog. So I would like to take this opportunity to thank my regular readers (there seems to be about 10 of you!) and would like to encourage you to post comments and maybe even take part in discussions. I also want to welcome new readers and I hope that you find some sort of entertainment value in this blog.

As always, constructive comments and suggestions are welcome!

I strive to have the photos on this site dominate rather than text. Text gets to be rather "blah blah blah" where as a photo is worth 1000 words. So I dug around on my work computer and found a photo I don't think that I have posted before. This is a test shot I did with my brass horsecar model to mess around with in Photoshop to see if I could make the photo look historic:

Like I said, its a test shot, never meant to be seen. The horses still need their harnesses, the car needs a driver, and the car needs to be posed so that the faces of the passengers can be seen, as well as details on the streets and sidewalks, and the buildings in the middle need to be painted!, etc.

Sorry about the lull in posting as of late. I've been using a computer regularly for over 12 years now and for the first time ever, my computer caught a nasty virus and has stopped working all together. All my modeling photos are on there so I'm in the process of retrieving them. Pain-in-the-A! Once I retrieve them, posting will resume. So hang tight. (You know, people who program viruses should try model railroading, I think they would find it much more rewarding!)


To update you on whats going on: with the birney project on hold, work has resumed on the trolley valence, I also have a new project in the works I think you will find fun, but your going to have to tune in from time to time to find out what it is!

So check back later to find out whats going on! Another year of fun stuff in store, yessir! Fun stuff in store!

Dandy

Friday, August 01, 2008

Trolley Malls

Is this a new trend?
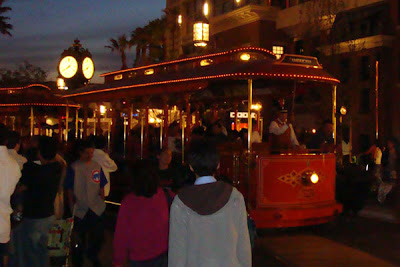
Somebody brought it to my attention that The Grove At Farmers Market in Los Angeles had a double-decker trolley running through it. So I made a date night with Cindy and we drove out to The Grove for dinner and a movie. Sure enough, there is a trolley! Battery powered though, no overhead wires, but a trolley all the same. The Grove makes for quite a romantic date, so we have been back on a number of occasions.

From what I understand, the trolley is built on a vintage trolley chassis from Boston. Talking to the conductor he noted that the new design includes a wider staircase to accommodate the larger sized Americans of the 21st century.


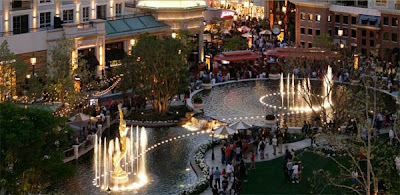
Now I come to find out that the Glendale is jumping on the trolley mall band wagon! May 1st of this year was the grand opening (I would have gone if I had known) 0f Americana At Brand (The mall is on Brand Ave).

Where The Grove At Farmers Market went with a double-decker trolley, Americana At Brand went with a two-car setup instead. And like The Grove, the trolleys negotiate the meandering, pedestrian only, idealized streets among many faceted buildings trimmed with many sparkling lights, and fountains spraying jets of water into the air synchronized to music.


I haven't been to Americana At Brand yet, so I think a romantic date with Cindy is in the cards soon! Yessir! A romantic date is in the cards!

Photo gallery of the Americana At Brand trolleys being built:
Visit The Grove At Farmers market:


Visit Americana At Brand: