Monday, July 18, 2022

SDERy Class 1 Car #135 ~ Tru-Colorization

Mahogany and Golden Yellow Paint for #135 

#135 went to the paint shop for some color:

Tru-Color brand paint is the paint of choice for this car:

TCP-256 Light Primer
TCP-069 Reefer Yellow
TCP- 082 Rich Oxide Brown
TCP-010 Black
TCP-730 Metallic Copper
TCP-288_Brass

Battleship Grey was tried for the roof but it was too dark. So I reverted to Light Primer which seems to be a ringer.

The front end prints of the car include a trolley controller! I painted the top of the controller Metallic Copper.  The Brass paint is used for the grab-handles next to the doors.

It has occurred to me that painting the car may be easier while it's still in its kit form.  This would simplify painting the interior, as well as installing window glass and gate screens.  If this car is a successful runner on my layout I will most likely build some more of these cars. I will give painting and detailing before assembly a try.

Color Theory


After their useful service life, three SDERy Class 1 cars were pushed together to make a "triple wide" house in El Cajon, California. A few years back these cars were "rescued" and one of them was cosmetically restored. But they painted the windows green. I don't think this is correct. 

Newspapers and magazines back in the day liked to write accounts of new streetcars. This article written for the Electric Railway Journal by H. M'Nutt, Superintendent of Motive Power San Diego Electric Railway describes the cars; "Selected cherry is used for all doors, sashes, moldings, etc, the surface being rubbed down and left with a dead finish".  
This leads me to believe that the window were painted green by the residence to help the cars feel more "homey". So I stuck to the Yellow and Brown scheme without the green.
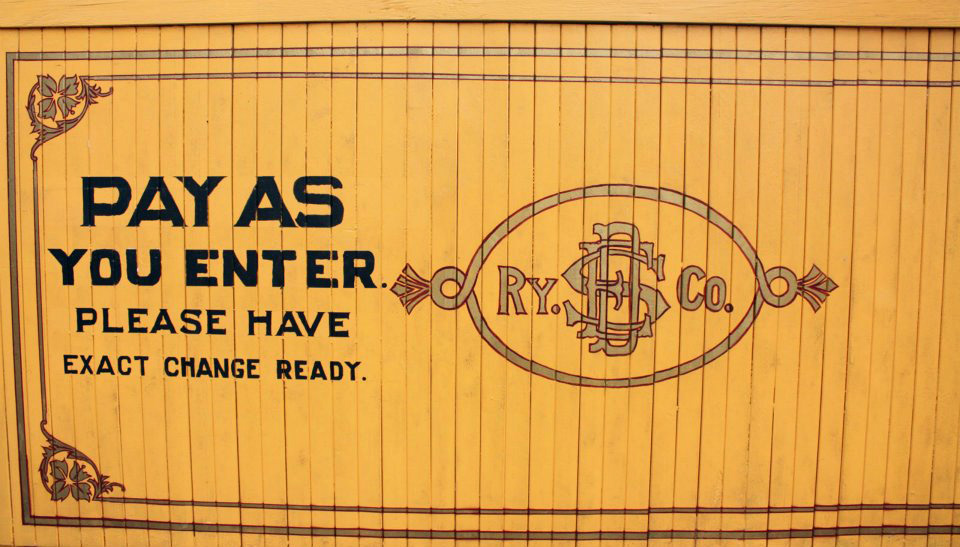
Next comes the stripping and lettering.  Which include gold!  So this will be a new venture in decal making for me.

Yes sir!
Special decals!

Dandy

Monday, July 04, 2022

SDERy Class 1's in H.O. Scale!

 West Coast Traction Supply's H.O. Scale San Diego Electric Railway Class 1 Streetcar Shell.

A beautifully designed 3D print kit of this historic car.


I got my wish! Andrew Chier saved me a lot of trouble by designing and 3D printing an H.O. scale model of San Diego Electric Railway's Class 1 streetcar for sale soon on his West Coast Traction Supply shop on Shapeways.


Some assembly required. But it goes together easy enough. Just make sure (unlike I did) that the upper portion of the center divider that is printed with the roof corresponds with the enclosed half of the car (the half with the smaller windows). Though I don't know if the center divider will be able to fit with the drive. We shall see when I get to that part of construction.

Some filing on the prints was required to smooth things out.  Then the parts were cleaned with Dawn dish soap and a sonic toothbrush to remove any oily residue that would prevent paint from sticking to the model.

This is the first time I've built a model with super glue.  I've been weary of using super glue since it can shatter in freezing temperatures. But nobody seems to be having that problem, so I went for it.  After it was all built and looking good I airbrushed on a couple coats of primer. Since the model will be painted a light color (yellow) I used a light primer.

Next comes painting. I'll be painting this car in San Diego's mahogany and golden yellow paint scheme.

Yes sir! Colors!

Dandy

Monday, June 13, 2022

Classy Class 1's

The 1912, San Diego Electric Railway Class 1, Center Entrance, Pay-As-You-Enter Cars. 

Numbers 125 - 148.  Built by the St. Louis Car Company

By the 1910's, San Diego's double deck and other single truck cars, as well as some of their California Cars, were getting pretty old. So the SDERy, looking to update its fleet, developed a new, modern car. The Class 1's:

The new design incorporated the feature that made the old California Cars so popular with riders, an open section on one end to take advantage of San Diego's mild climate and an all weather enclosed section on the other end for when San Diego's mild climate wasn't so mild.

Another feature was the depressed center section. The lower floor meant that passengers didn't have to climb so high to get in the car. This safety feature reduced step accidents dramatically when folks were boarding and exiting the car.

The big innovation was the P.A.Y.E. system (Pay-As-You-Enter).  The conductor was stationed at the center of the car, opening and closing the gates and collecting fares as passengers boarded. This feature would soon be adopted with other cities around the nation. 

The cars are designed in the Art's and Crafts style with tall windows, and an arch roof. This gave the car a very airy, roomy, modern feel to it. 'They were adorned with warm yellow colors, gold-leafed oak leaves, hand-polished cherry wood, and solid bronze hardware -- even the push buttons passengers used to alert the motorman were inlaid with mother-of-pearl'. -Wikipedia

Painting by Ken Eberts
Apparently, with the more efficient loading and unloading as well as more powerful motors, these cars made good time and allowed the company to actually run less cars, thus improving profits.

You know, for such a successful, innovative and attractive car, it sure would be nice if someone came out with a model of these wonderful, stately cars.

Yes sir! Sure would be nice if someone came out with a model of these cars!

Dandy

Monday, May 16, 2022

1926 SDERy Route Map

 Geesh! The San Diego Electric Railway modified it's routes often!

Here is how it appeared in 1926 according to the April 1943 issue of the Railroad Boosters Wheel Clicks publication.

I'm posting it here for posterity considering the rarity and delicacy of this issue. Click to make huge:


My latest effort is fabricating destination dash signs for my San Diego streetcars. So I'm collecting material about the various routes. I'll keep you posted.


Yes sir! Destination Dash Signs!

Dandy

Saturday, January 01, 2022

Ain't it Grand!

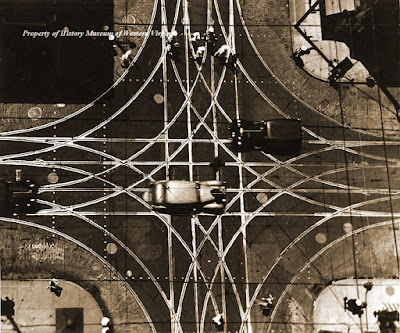
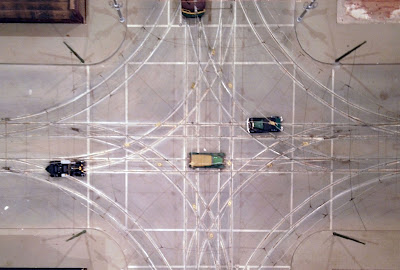
 A Great Photo of a Grand Union Intersection from Roanoke, Virginia taken in the 1930s.

Photographed in ideal conditions as well- nice new dark asphalt and the sun is just right to light up the rails.

This junction was at the intersection of Campbell Ave, and Jefferson Street in downtown Roanoke. 


What is interesting to me is how tight the intersection is. The rails of the left turn routes intersect right on the rails of the through routes. I don't think a Grand Union Junction could be any tighter.


 The overhead wire geometry is next to impossible to make out. It's easier to see its shadows. Is this four contact wires converging on one frog!?! 


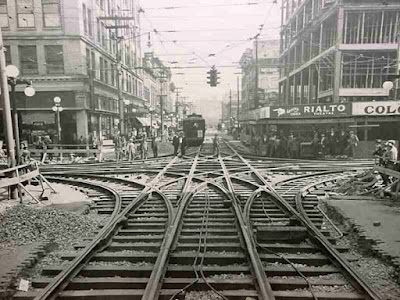
Construction Photo ca 1927.

My intersection is downright luxurious in comparison. The curves are very broad and yet still very tight for HO scale (my left turns are 7 9/16" radius or 55 scale feet). 

Anyway- I thought I would share this interesting piece of construction. Yes sir! Thought I would share!

Dandy


Monday, October 04, 2021

For Justice and Glory!

 Anybody Remember the Keystone Cops?

I thought it would be funny to model them.


The Keystone Cops (often spelled "Keystone Kops") are fictional, humorously incompetent policemen featured in silent film slapstick comedies produced by Mack Sennett for his Keystone Film Company between 1912 and 1917  -  Wikipedia

After the demise of Jordan Highway Miniatures vehicles I started looking around for other period models. This Model T Ford is a 3d print from Robert Sprague 3D Designs on Shapeways. It's not as fine of a model as Jordan but I wanted to see what I could do with it.

Tru-color paint was used for the black.  But the Floquil metallic paint used on the radiator and other details turned out too glittery for my taste. It works fine on tiny details like the hubcaps, but the broad expanse of the radiator and even the marker lamps is too much. A brass colored paint would look a lot better for this.  As is typical of 3D prints the model has some visible strata from the printing process and some details are oversized to meet the 1mm minimum thickness.  
But truth be told- I'm trying to get G scale results with HO scale models with this ultra close-up photography I'm doing. But really the model looks just fine when observing the scene when standing next to the layout.

So it is what it is.  When it comes time to populate my layout with automobiles I'll reassess this model to see if I'll use it or not.  And then I called the Model T project finished for now.


Then, while researching something unrelated, I came across this production still from a Keystone Cops flick.  "Hm! I wonder if I could model that" I wondered to myself . "Well... I do have that Model T model and covering it with cops would hide most of it defects" I replied to myself. "Ah- but what about all those cops" I countered, "nobody manufactures HO scale cops like that". Darn! I was right. I was defeated. Until I came across this:  
 
Preiser Unpainted Firemen. The uniforms are really similar and they even have those helmets like the Keystone Cops! Well what do you know?  Everything fell into place. This is a feasible project after all. Well I gotta do it now!

Trying out different figures to see where and how many I can fit.

The 12 selected figures were primed with Tru-Color grey primer.  Then they were painted with FolkArt craft paint. Not as nice as model paint but effective. The buttons and badges were painted with the same Floquil Brass glitter paint as the automobile. 

The Walrus Moustaches are a must!  Now its time to see how many of these guys I can fit in the auto.

I really didn't expect to fit them all in- but they all fit in! Well technically the 12th one isn't IN the car but is running to catch up.

Here is the photo set-up. My phone that I'm taking the pictures with doesn't fit under the overhead wires. So it is laying on a cardboard tube cut to length to keep the phone just above the wires. Under the camera lens is a First Surface Mirror set a 45 degree angle aimed at the scene. A flashlight is illuminating the "sky".

And voila! The completed scene.

I might revisit this at a later date. Add some billy clubs to their hands. I'll see if I can introduce the appearance of speed. Maybe turn those front tires so its making a hard turn and introduce some lean to the suspension. I'll take a look at those Artitech Model T's when they become available again.

But for now I'm satisfied. I think this photo is hilarious.

Yes sir- hilarious!

"Good job Dandy"
"Awe thanks Dandy"

Dandy

Monday, August 30, 2021

Frogs on the Overhead

 Overhead Crossing Frogs


I just noticed that I haven't finished swapping out the temporary overhead crossing frogs with commercial frogs.


But the temporary frogs have been working out so well that I might just keep them!


Negotiating Frogtown.


Here are the four 90° double track crossing overhead frogs (track obscured for clarity). The two crossings on the left still have the small washers that I was using for temporary crossing frogs. The two crossings on the right have been finalized with crossover castings. But since the washers have been performing flawlessly and they have a much smaller appearance that I've decided to keep them as is. They just need to be finalized by trimming the excess wire and solder it all in place for electrical continuity.

As for the angle crossings I don't think the washers were working well for that. So they have been swapped out for the adjustable crossing frogs. These work great.

Rivers Trolley & Traction Adjustable Crossovers are what I used. But I have no idea where a fella can purchase them these days. Might have to monitor eBay closely for them.

Yes sir! Closely monitor eBay for frogs!

Dandy

Monday, August 02, 2021

How 'bout Them Apples!

 In studying photos of 19th century city streets I've noticed that "road apples" are quite ubiquitous.

But the question is: should droppings be modeled?

I mean- it is natural after all. Horses are going to doo what horses gotta do!

Both Images: Shorpy.  Color: Hotpot

And doo they do a lot! It was quite the problem back in the day. Particularly in New York City that when the elevated railroads were built the steam locomotives were hailed as a solution to the pollution!

But doo I want to model "excreta" though? I suppose I might if it's not too conspicuous- one of many details to notice. And it is kind of funny. But I doo want to be careful- it is a poop joke after all. I don't want to be crass. Just... realistic. Which begs the question- what to model dung with?

The question of what to use to model "after parts" had been lurking in the back of my mind for some time now and one morning while emptying my coffee maker I noticed that the used coffee grounds are about the right size and color for manure. So I set up the test photo shown at the top of this post and well, yeah, not a bad result. So I'll keep it in mind and see if I can tastefully incorporate "effluent" into some of the scenes on the layout when I get to the detailing stage of layout construction.


All I need now is for someone to make some HO scale Pooper-Scooper figures, then I can make a nice little scene like this.

Yes Sir! HO scale Pooper-Scoopers!

Dandy


Monday, July 19, 2021

Street Congestification

 Oh! Traffic Around this Town is getting Nuts!

Left to right: Hauler: Velociped, Berkshire Valley: Buggy,  Artitech: Ford T Runabout,  LMB Old Time Trolley. with Preiser and A.C.Stadden figures.

I'm finally getting some nice photos on the layout.
Yes sir! Finally!

Dandy

Sunday, July 04, 2021

Fireworks

 Electrical Arcing at the Southern California Railway Museum.

The track was relocated but the overhead hadn't been yet. So the brakeman had to try and guide the trolley wheel. But when the wheel left the wire, fireworks ensued.


One thing the video didn't capture was the brilliant green color of the arching: 


Enjoy the fireworks and have a happy 4th of July.
Yes sir! Happy 4th of July!

Dandy

Monday, June 21, 2021

Spanned

Successfully Strung a Span Wire Between Two Electroliers - Without Blowing out the Lamps!

This is a big relief since the brass Electroliers are ground for the 3 volt DC streetlamps AND act as an anchor for the 15 volt AC overhead.


The fear being that the 3 volt LEDs are exposed to the 15 volts running current. But since each have their own power source it doesn't seem to be a problem.

Now that all of the Electroliers are in I would really like to install the span wires between them. The overhead in the intersection is a bit bouncy without them. After the success of a little test rig I have commenced stringing the span wires.

These old wooden temporary poles and span wires can finally be removed. The poles were on the building property line and with them gone now, I can finally get to building the buildings.

Trying something new here.  The rule has been Nickle Silver wire for the contact wire and Phosphor Bronze for the span and pulloff wires.  But for these new span wires I'm trying 30 AWG High Quality Polyurethane Enameled Copper Wire. This wire is softer and much easier to work with. The phosphor bronze I was using just loves to pierce the skin!

I found the Polyurethane Copper Wire much easier for wire wrapping and its easier to straighten than the phosphor bronze.


Hmmm... seeing my wire wrappings up close in photographs I see that my wrappings are kind of loose. I need to work on tightening my wire wrapping skills.

Yes sir! Tighten my wire wrapping skills.

Dandy


Monday, June 07, 2021

Horsing Around

 Horse Trading and Harnessing

Comparing HO scale harnessed horses and adding duct tape reins. 


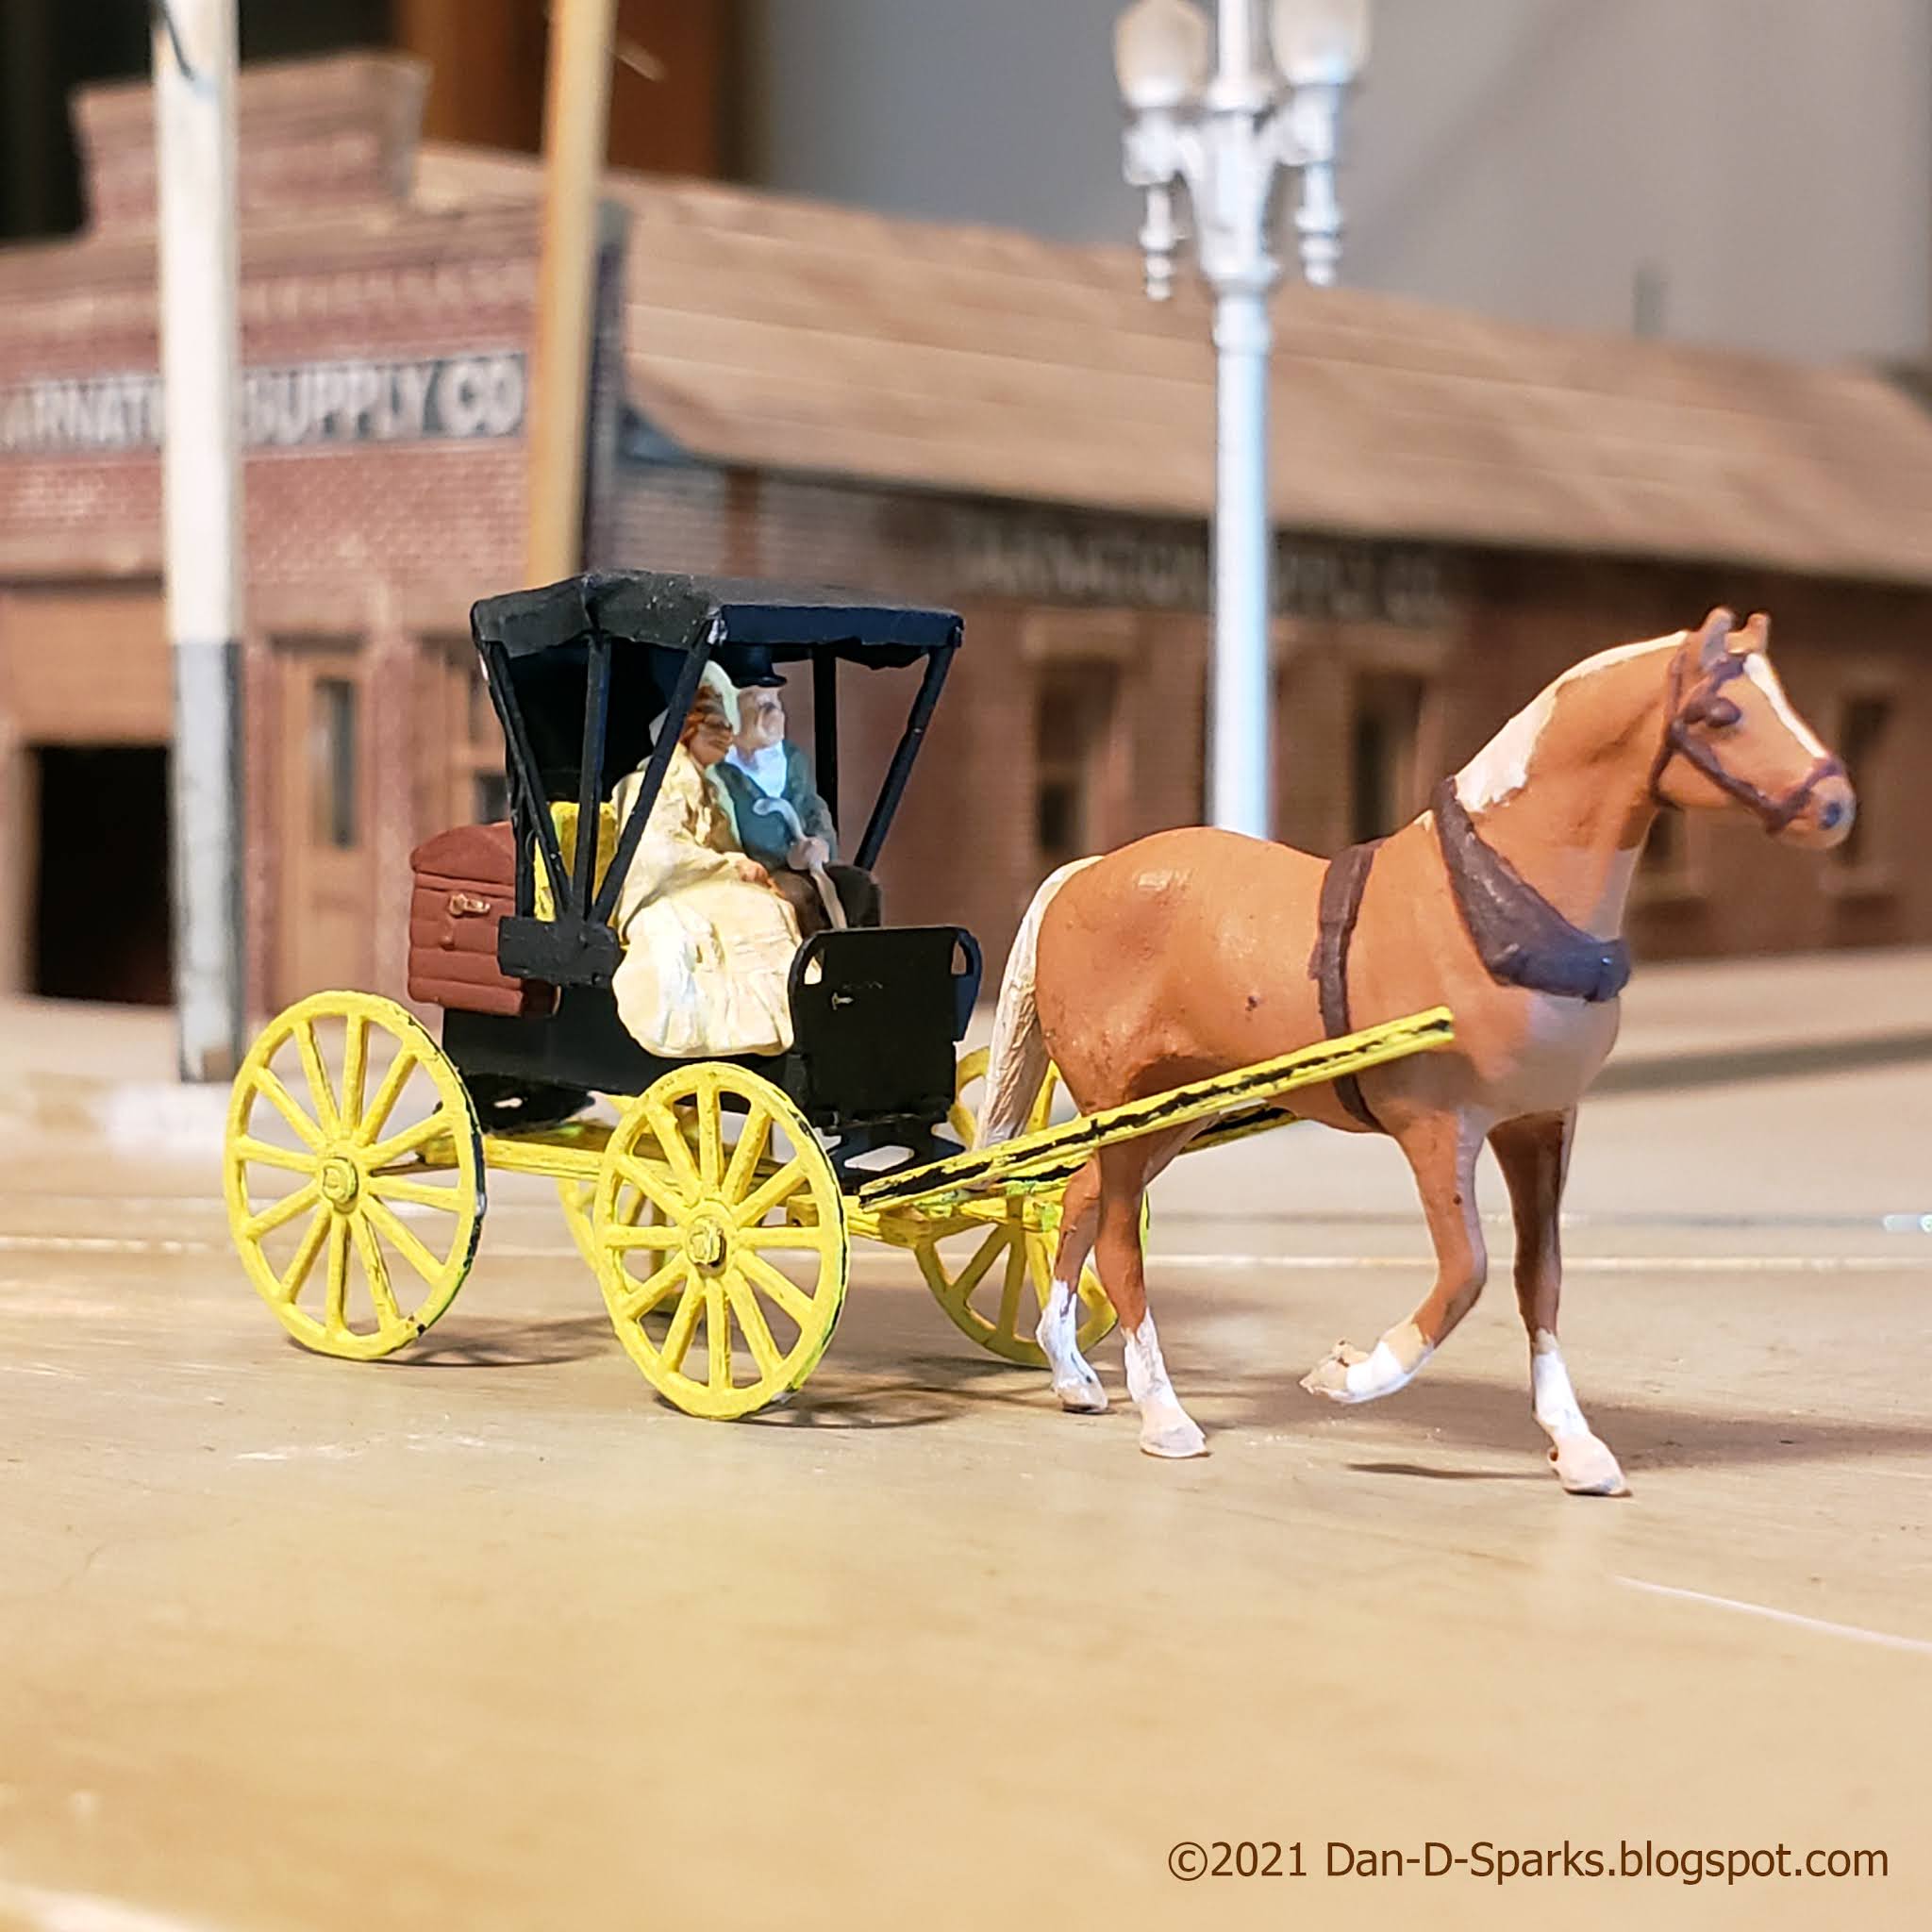
After finishing construction of the Berkshire Valley Models Buggy (right) I needed to add a horse. But the horse that Berkshire Valley offers (left) is rather heavily harnessed for such a light buggy. So I looked around at other HO scale harnessed horses.

It wasn't until after I ordered horses from Knuckelduster Miniatures that I noticed that their horses are identical to Berkshire Valley's horses! (They do come in two poses though). So choices are limited. Taking a look at the Jordan Highway Miniatures (out of biz sadly) horses (left) I noticed that they are more lightly harnessed. So I swapped out the horses with the Highway Miniatures Delivery Wagon since heavier harnessed horses would work better with that.

So I painted up the Jordan horse and attached it to the buggy. But after the previous blog post, the lack of reins bothered me. I considered different materials for the reins (thread?, tiny brass or styrene bar?) But as I was repairing a black leather seat with black duct tape it occurred to me this might make for great reins material.

I laid a piece if duct tape on a piece of glass and sliced off a very thin piece.

And stuck it on. The bottom and sides of the duct tape is white, so a little touch-up paint is required. But I really like the leathery look of the duct tape. Note to self: start with the driver and work towards the horse. Its easier to trim the reins at the nose of the horse rather than inside the buggy.

It was a little tricky installing the reins. But it took me longer to write this blog post than it took to install the reins, so... yeah. But I'm pleased with the results. We'll see how this holds up long term.

It occurred to me that duct tape might be a viable way to add harnesses to ho scale farm horses like these from Woodland Scenics. Then we can press these guys into service! (Except for the pony of course - I'm not heartless!)


Then there are also some well done draft horses available on Shapeways. I'll probably give these a try at some point.
So there are some good options out these these days for a variety of harnessed horses.

Yes sir! A good variety of horses these days!

Dandy