Read the Free Trolleyville Times Monthly for the Latest News on Prototype and Model Traction!

Tuesday, December 27, 2022

Happy Holidays!

 State-of-the-Layout.

Setting up a scene to determine the best photograph that can be taken of the layout. 

And this is the result:

It's getting there. Slowly but surely it's getting there.

Yes sir- slowly but surely.

Dandy

Monday, December 05, 2022

#135 ~ Precision Instrument

 Trolley Poles and Hold Down Hooks

Fabricating some trolley pole hold down hooks.

Last time I already installed the trolley pole bushings but then I goofed and installed the weights before installing the trolley pole hold down hooks.  

But looking at the prototype hold down hooks, I may have not goofed at all! I think I can work with this.

For the Trolley Poles I used Miniatures by Eric Traditional Trolley Poles HTP4.

The hold down hooks are fabricated using some .015x.042 Brass Flat Bar from Detail Associates.

The hold down hooks need to be at a height so that the trolley poles are horizontal when in the stowed position.

The .015x.042 brass bars slipped between the roof and running boards nice and snug.  A little epoxy will hold them in place.

I think I got the angle just right!  I painted the hold down hooks black and glued them in.

Ooh! Nice!  #135 is looking like the precision instrument that its meant to be!

Yes sir!
The precision instrument its meant to be!

Dandy

Monday, November 21, 2022

#135 ~ Weights & Measures

 Heavy Models Make For Good Electrical Contact With The Rails.

Since the Weights are Big- Now is a Good Time to Figure Out Where They Should Go...

...before adding interior lighting and threading the wires everywhere.


The ceiling of the car seems to be the most logical place for the decoder and weights since the floor is full of motor and power trucks and interior details. 

Since the weights have to fit between the car ends and trolley pole bushings- Now is a good time to install the bushings so I can determine just how many weights I can fit there.

The bushings were tinned with solder before adding the weights, being sure to use a heatsink so as not to melt the plastic.

The auto parts store is a great place to get 1/4 oz weights. I was able to fit 4 of these 1/4oz tire weights between the car end, pole bushing and above the windows.  And another 4 on the other end of the car, for a total of 2 ounces. I painted them black to help them not be so conspicuous. Because the roof is arched the weights won't lay flat. So I slathered the edges of the weights with hot glue and squished them into place.

Now you would think that while adding the pole bushing I would have also considered the pole hold-down hooks since they too penetrate the roof.  But no. I forgot. So now I gotta figure out how the add them with those big ol' weights glued in tight right where the hold-down hooks come through. But that will be for next time.

The weights are well hidden up in the tall roof and not so visible trackside.  And now the car has some nice heft to it.

Yes sir! Hefty!

Dandy

Monday, November 07, 2022

#135 ~ Glassed & Weathered

Adding Window Glass plus Dust and Grime.

An attempt has been made to make the car look like the daily conveyor of the public over the dry, dusty, unpaved streets of early 20th century San Diego.


The car was weathered with Bragdon Weathering Powders.  I managed to go a little more overboard with weathering than I intended to but, the car is looking like the hard working wooden cars it's meant to represent.  Also, the SDERy trolley company didn't seem to wash their cars much, so I'm not too far off.

After sealing the weathering with DullCote, the clear styrene was installed.  Individual panels for the end windows and the door, and a continuous piece for the side windows. The clear styrene was glued on with canopy glue.

Looking at historical photos of these cars I get the overall impression that they were pretty grimy. So I don't think that I'm that far off.

Yes sir!
I'm not that for off.

Dandy

Monday, October 24, 2022

#135 ~ Backwards, Working

I kind of Jumped the Gun with Putting this Model Together Already.

Going Back Now to Taking Care of a Few Things Before Continuing.

The decoder for this model came in the mail and I was already to install it when I realized I haven't worked out the lighting yet!

Preparing the model for headlights would have been a whole lot easier if it was done before all the sides were glued together. I determined that the wires need to routed up behind the front window posts. But before I can do that, I need to add the window glass first so that the wires don't end up between the posts and the glass!

So while preparing the window glass it occurred to me that I need to do the weathering first because the car will need to be sprayed with a Clearcoat which would craze the plastic glass if it were in place!

So now I'm working on the weathering! Hopefully I've gone far enough back where I'm not forgetting anything else. Then I can start working forward again.

Yes sir!
I can start working forward again!

Dandy


Monday, October 03, 2022

#135 ~ Motorin'

 A Motor and Mechanism for #135

West Coast Traction Supply's Model of the SDERy Class 1's were Designed to Fit the Bowser Drive System .


So I ordered the Bower Drive System from CustomTraxx (125130).

Installed! But I did need to do a little filing of the floor to get the truck to swivel properly.

The only tools I needed to purchase (and should have already had) is a 2-56 Tap and T-Handle so I could thread the plastic to accept the mounting screws.

A.J.'s video for installing a Bowser into a Illinois Terminal box motor is identical for the SDERy car. So this is what I followed for the installation.

A little filing of the bolster was required to help the gearbox to clear the tightest radius curve on the layout (6 7/8").  But it looks like I'm going to have to remove the skirting on the bottom of the car for the side frames to clear.  It's essentially a choice between a perfect looking model or an actual running model.  This layout is designed to move!  So I'll take the hit on the side frames so I can run these cars on the layout.

Yes sir!
I'll take the hit.

Dandy

Monday, September 12, 2022

#135 ~ Silver Gates

 Modeling Gates For the Class 1 Cars

Considering different materials to simulate the chain link construction.


Invented in the mid 19th century and brought to the United States in the 1890's, I suspect that chain-link fencing may still have had a novel quality about it when these cars where built, before becoming somewhat of a blight on the landscape by the mid 20th century.


I had some Precision Scale Brass Screen left over from previous projects so I decided to use that.

I cut the screen to size and then painted it silver.

And glued it to the car. I tried using CA (super glue) but found it too difficult. I settled on using white glue. That gave me plenty of time to position it before it dries and gives me the opportunity to remove it later.

But I'm not real pleased by how dense the screens look. It should have a more of a see-through quality about it.
So I might try something else.


Several different model manufactures offer screen material in various size meshes for modeling. Somehow I would need to determine the mesh size needed. Clover House lists scale conversions for their mesh sizes. Available in brass or nylon.

Another inexpensive option is Tulle from fabric stores. Tulle comes in a wide variety of sizes and materials.

I think I'll leave it as is for now and reevaluate when the construction of the car is complete.  If it still bugs me I'll swap out the gates with one of these other materials.

Yes sir! If it still bugs me!

Dandy


Monday, August 15, 2022

#135 ~ Signs of Destiny

 Researching and Making Decals for Route Numbers and Destination Signs

In the Vast Majority of Photos of the Class 1's, the Cars are Sporting Destination Signs. So then Shall My Cars.

But this turned out to be a big research project to determine what exactly these destination read.

Fortunately I have accumulated a lot of photos of these cars over the years. So I can actually read what most of the destination signs read.  But I don't have photos of all the routes, so I have to make educated guesses as to the rest.

The San Diego Electric Railway seemed to change some of its routes rather often making it kind of difficult to determine what exactly the routes where when these cars were new.

Schedules published during that era gave some helpful route descriptions. What I had to do was determine what they would have put on the signs.

And this colorful display is what I came up with. (Click to make Big). The colors are a complete guess though- routes weren't color coded back then like they are now. So I may have gone overboard with the colors. But it shor is purty!

Detail view. I will be making these decals available to you through Custom Traxx very soon.

Yes sir!  Destined to you very soon!

Dandy


Monday, August 01, 2022

SDERy Class 1 Car #135 ~ Decals

 Metallic Gold Decals for #135

Designing and printing metallic gold decals will be a new adventure for me.


Christian Chaffee who saved the three remaining SDERy Class 1's from destruction is shown here with an original panel inlaid with gold-leaf filigree. 

Because these decals have a metallic color I'm having to send them out to be printed. The company I chose to print them is none other than the "couple people" Kadee! They have an ALPs printer capable of printing metallic colors.


Fortunately for us, good photos exist that clearly show how the lettering and striping was laid out. Because the drawings I do are being sent to a printer, my drawings have to be "printer ready". So I chose to draw them with Adobe Illustrator. I loaded the photos into Illustrator and scaled them to HO scale. Then I was essentially able to "trace" the photos. 

I had to make a compromise though.  Kadee can only print 3 colors with the ALPs printer.  The original cars have brown with gold-leaf.  But printing brown is a three color process. So brown + gold = 4 colors. So I had to go with black + gold. Luckily it turned out great!:

And here are the printed decals I got back from Kadee!  There are enough for 5 cars on one sheet. I will cut this up so that they can be sold, most likely through Custom Traxx.

Next comes making a sheet of Route and Destination Signs decals. That'll be a big project to research!

Yes sir!
A BIG project! 

Dandy


Monday, July 18, 2022

SDERy Class 1 Car #135 ~ Tru-Colorization

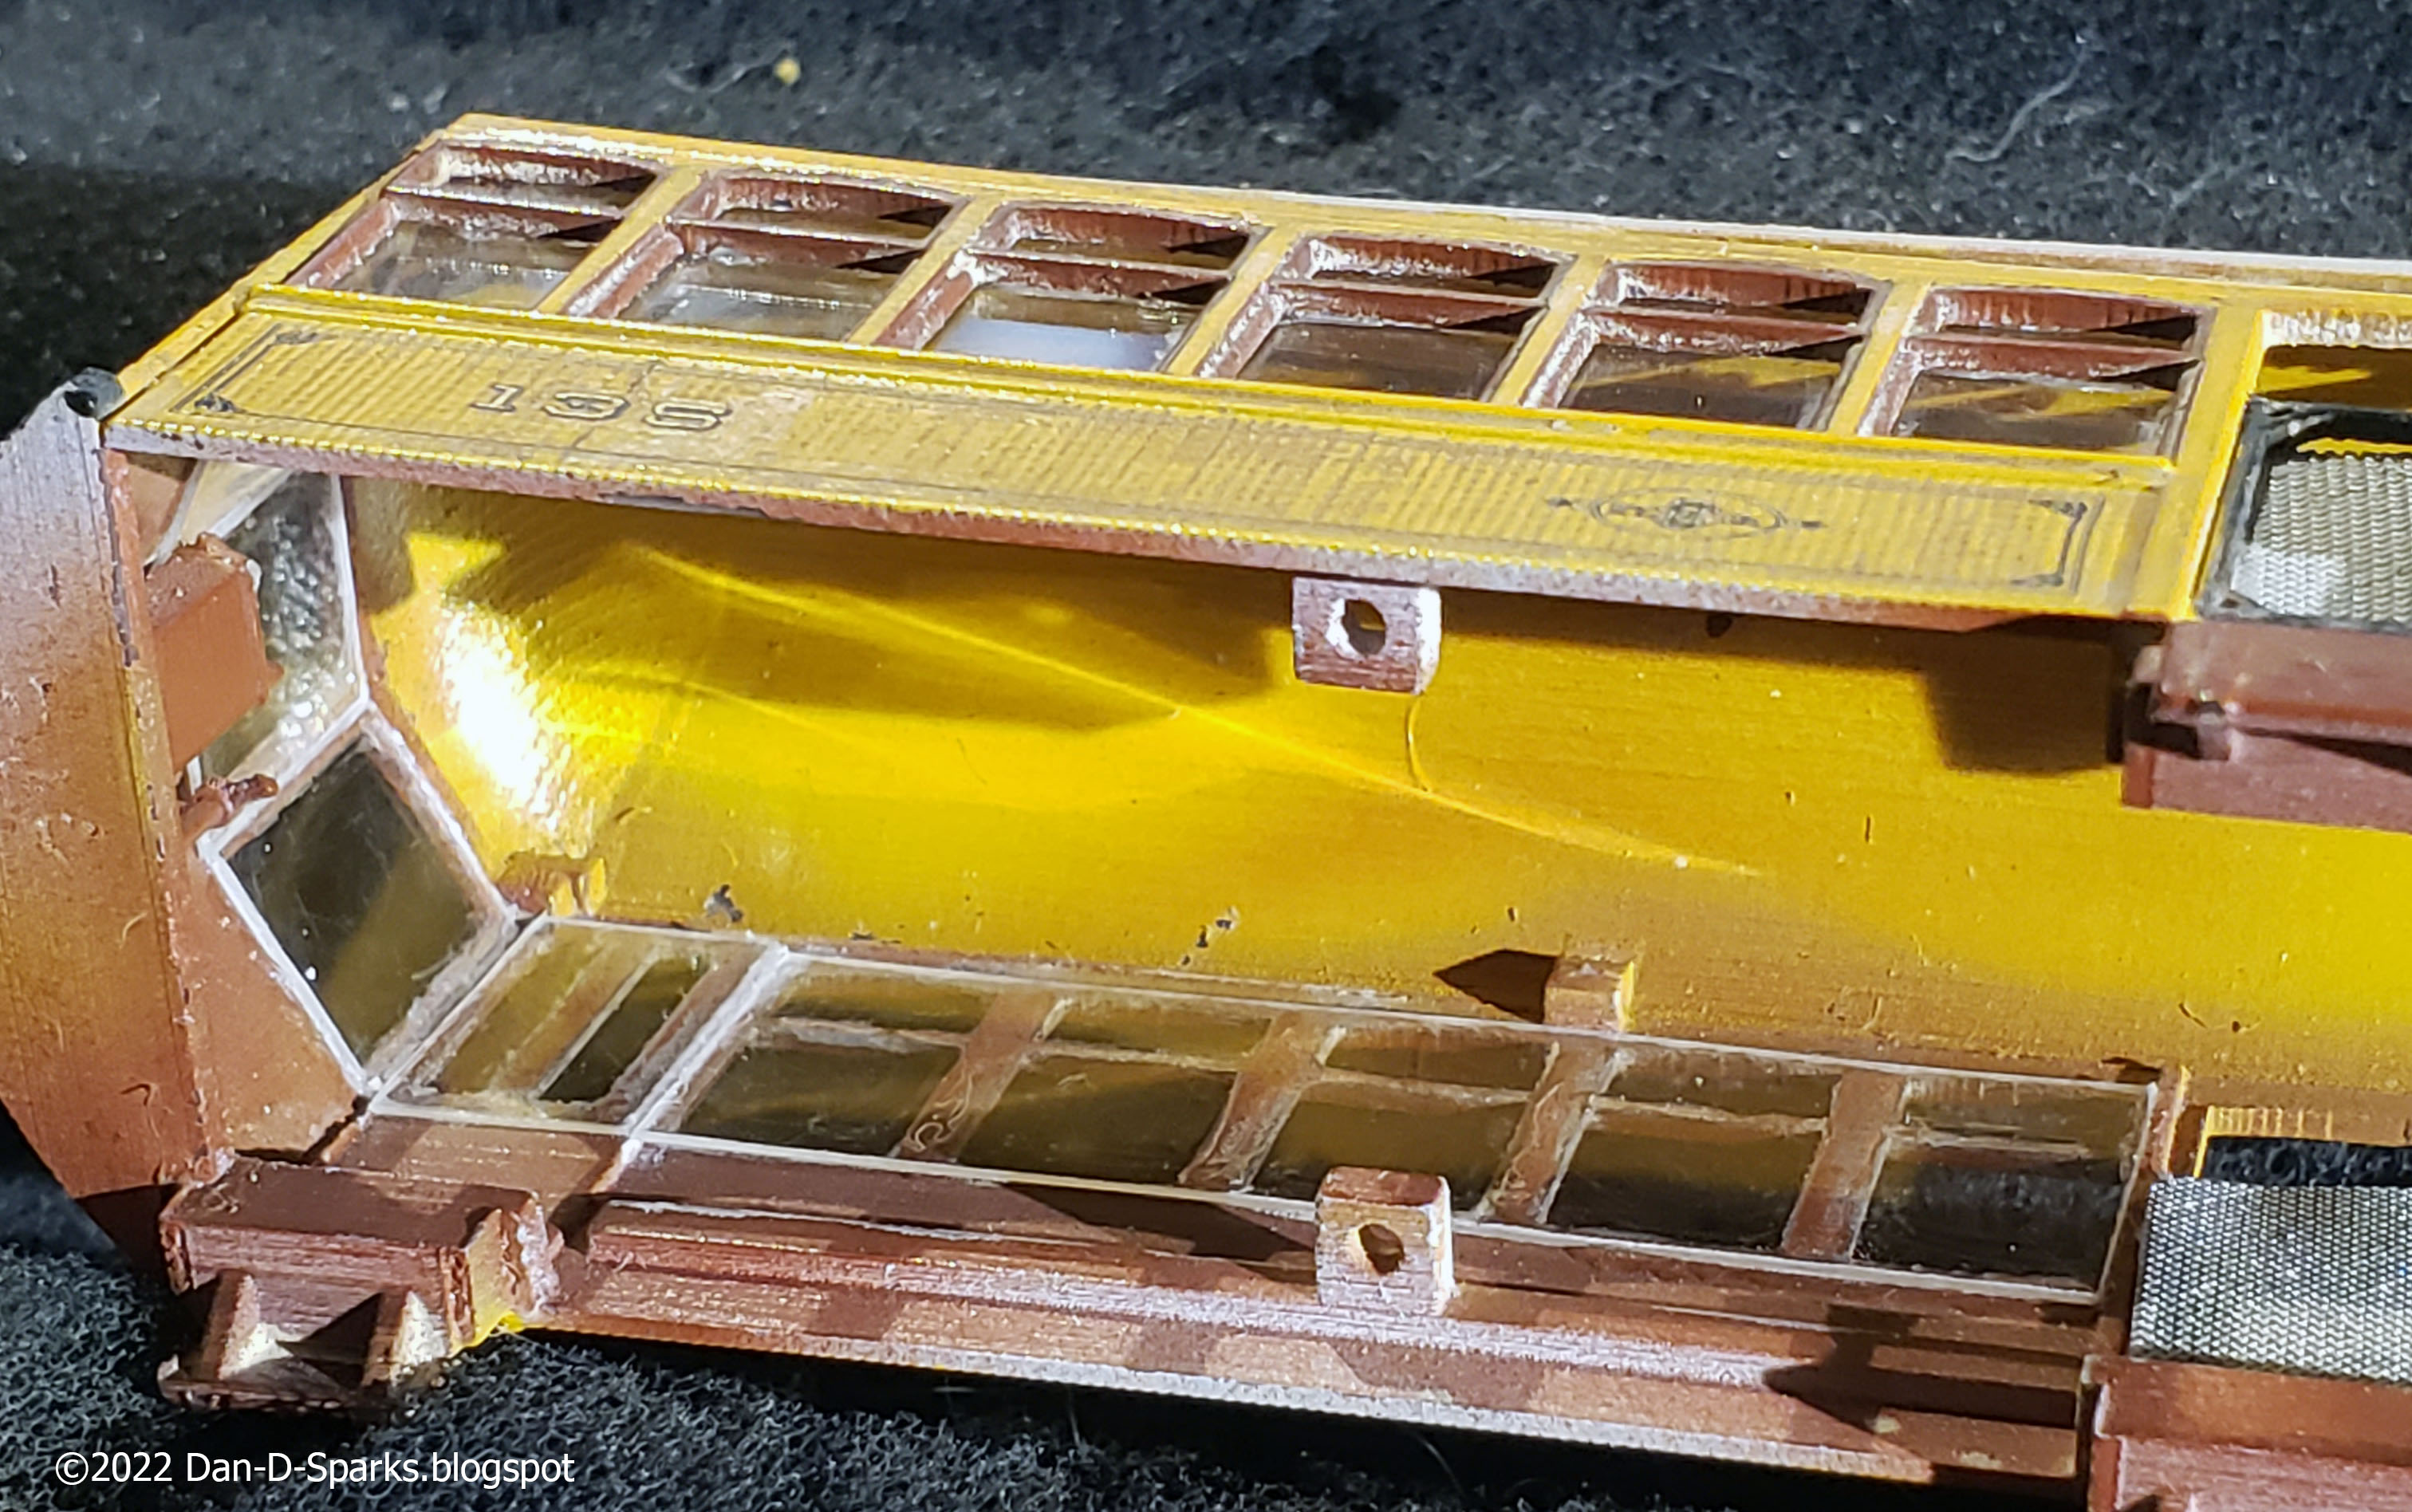
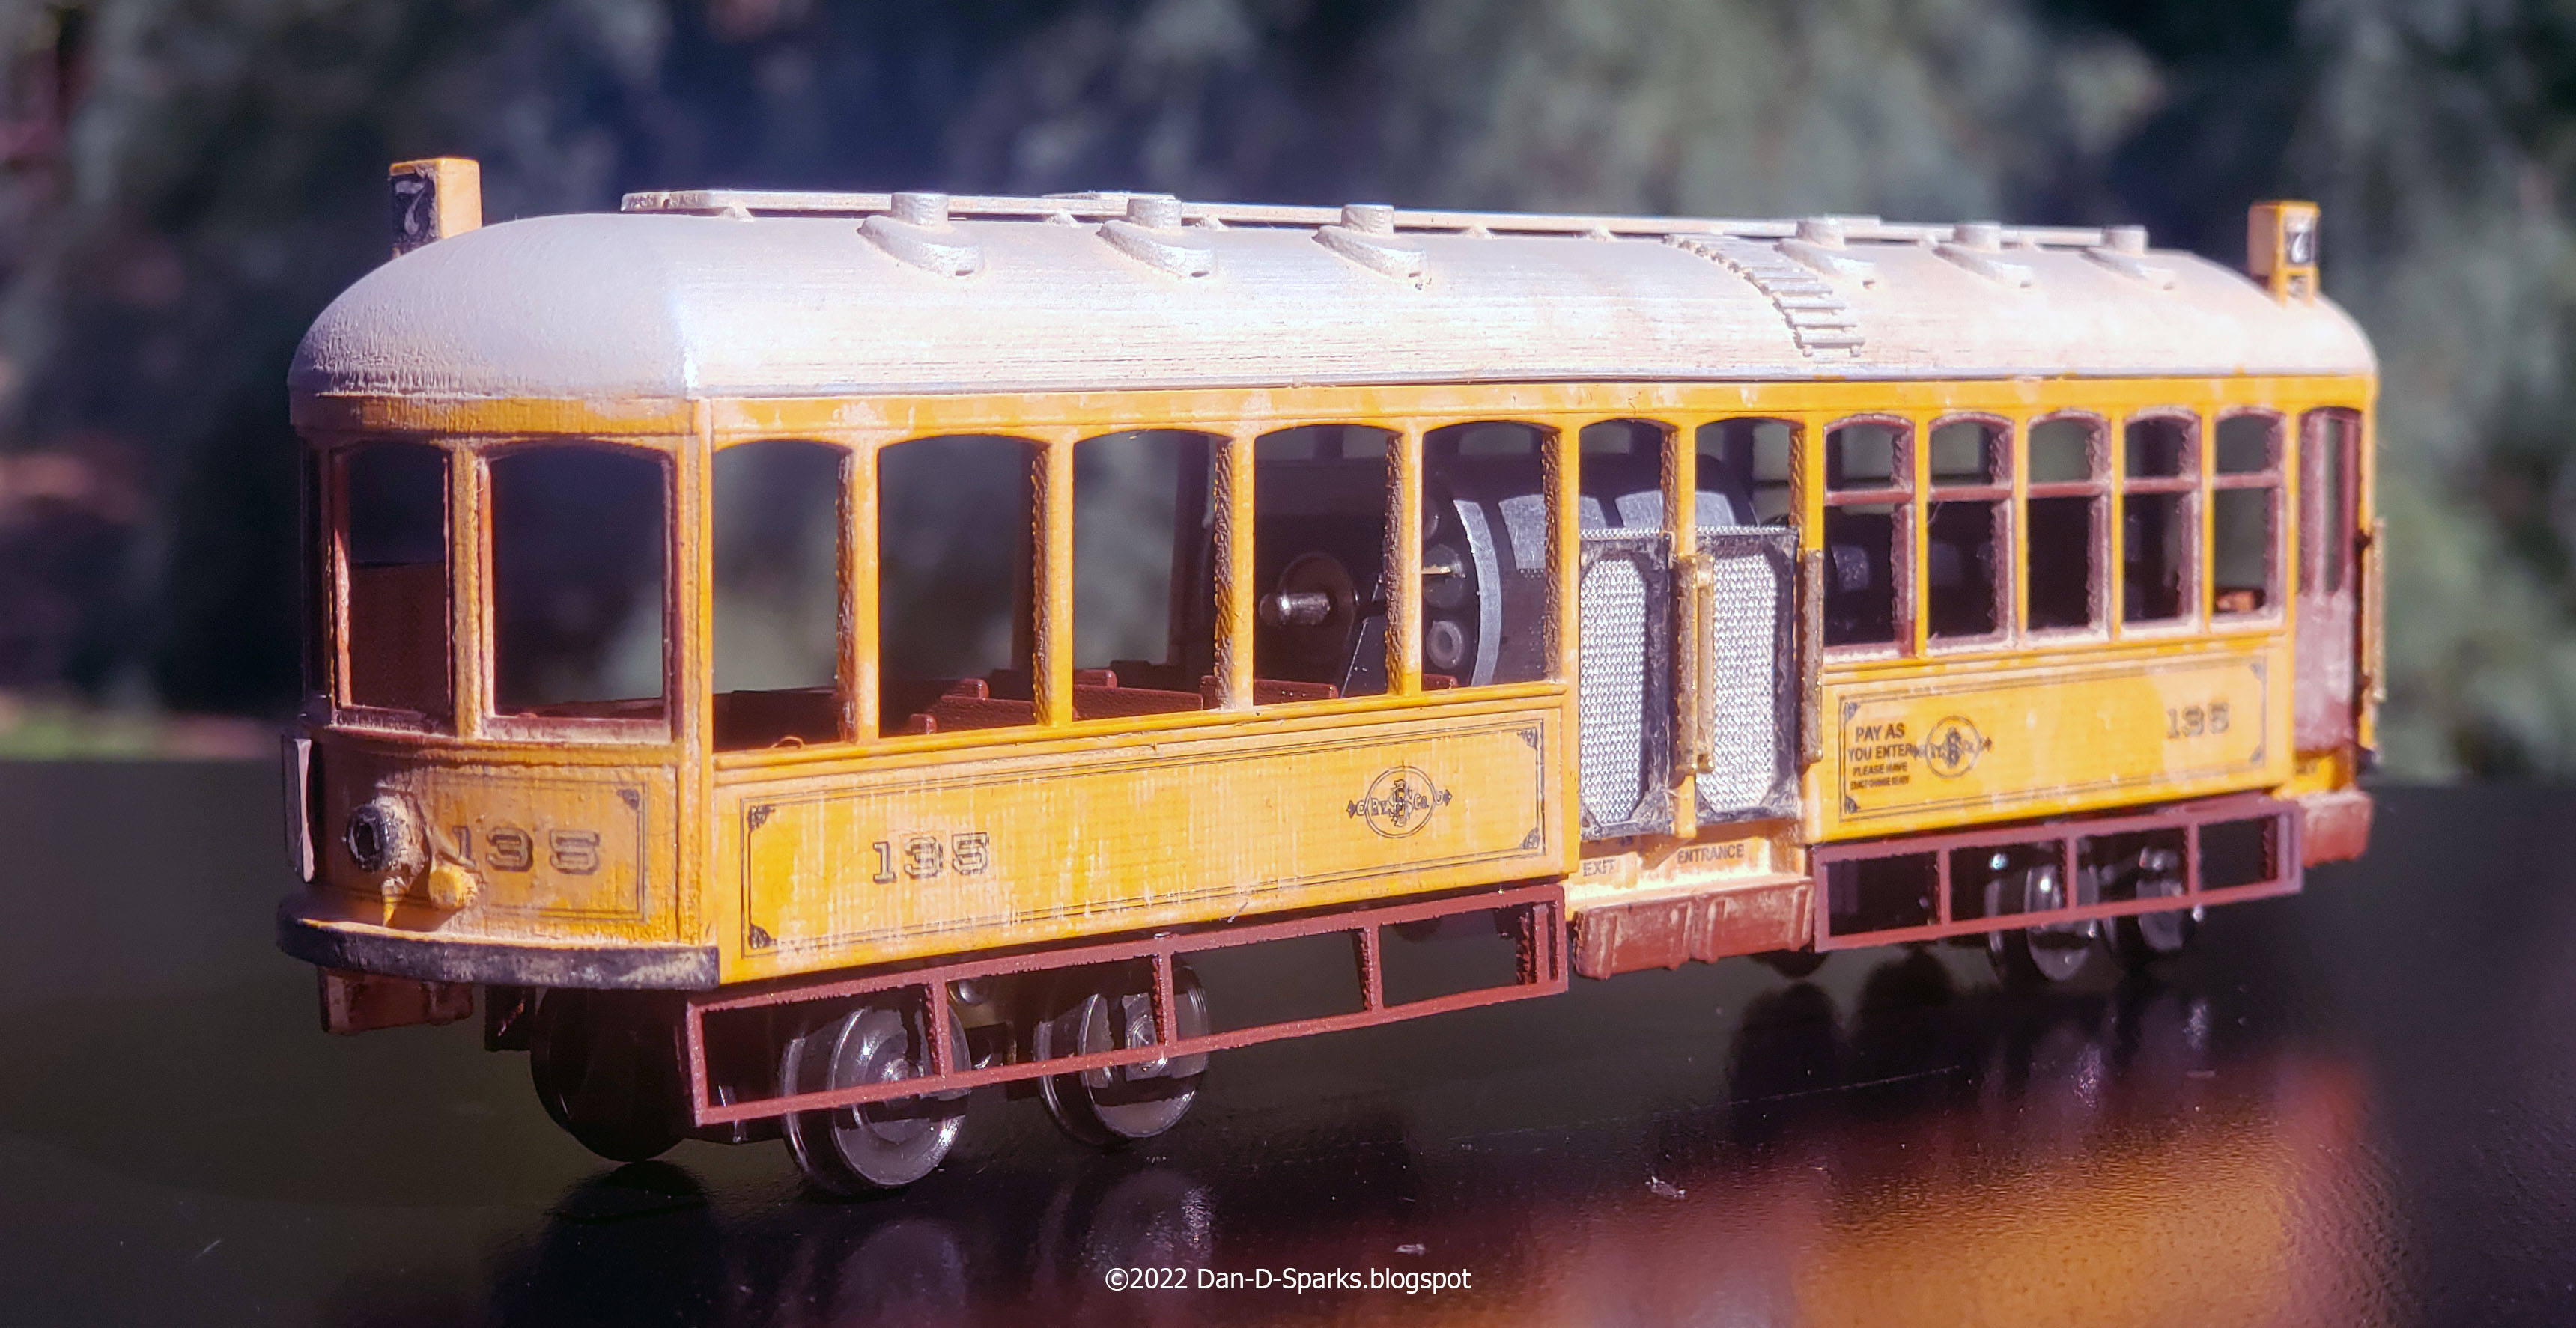
Mahogany and Golden Yellow Paint for #135 

#135 went to the paint shop for some color:

Tru-Color brand paint is the paint of choice for this car:

TCP-256 Light Primer
TCP-069 Reefer Yellow
TCP- 082 Rich Oxide Brown
TCP-010 Black
TCP-730 Metallic Copper
TCP-288_Brass

Battleship Grey was tried for the roof but it was too dark. So I reverted to Light Primer which seems to be a ringer.

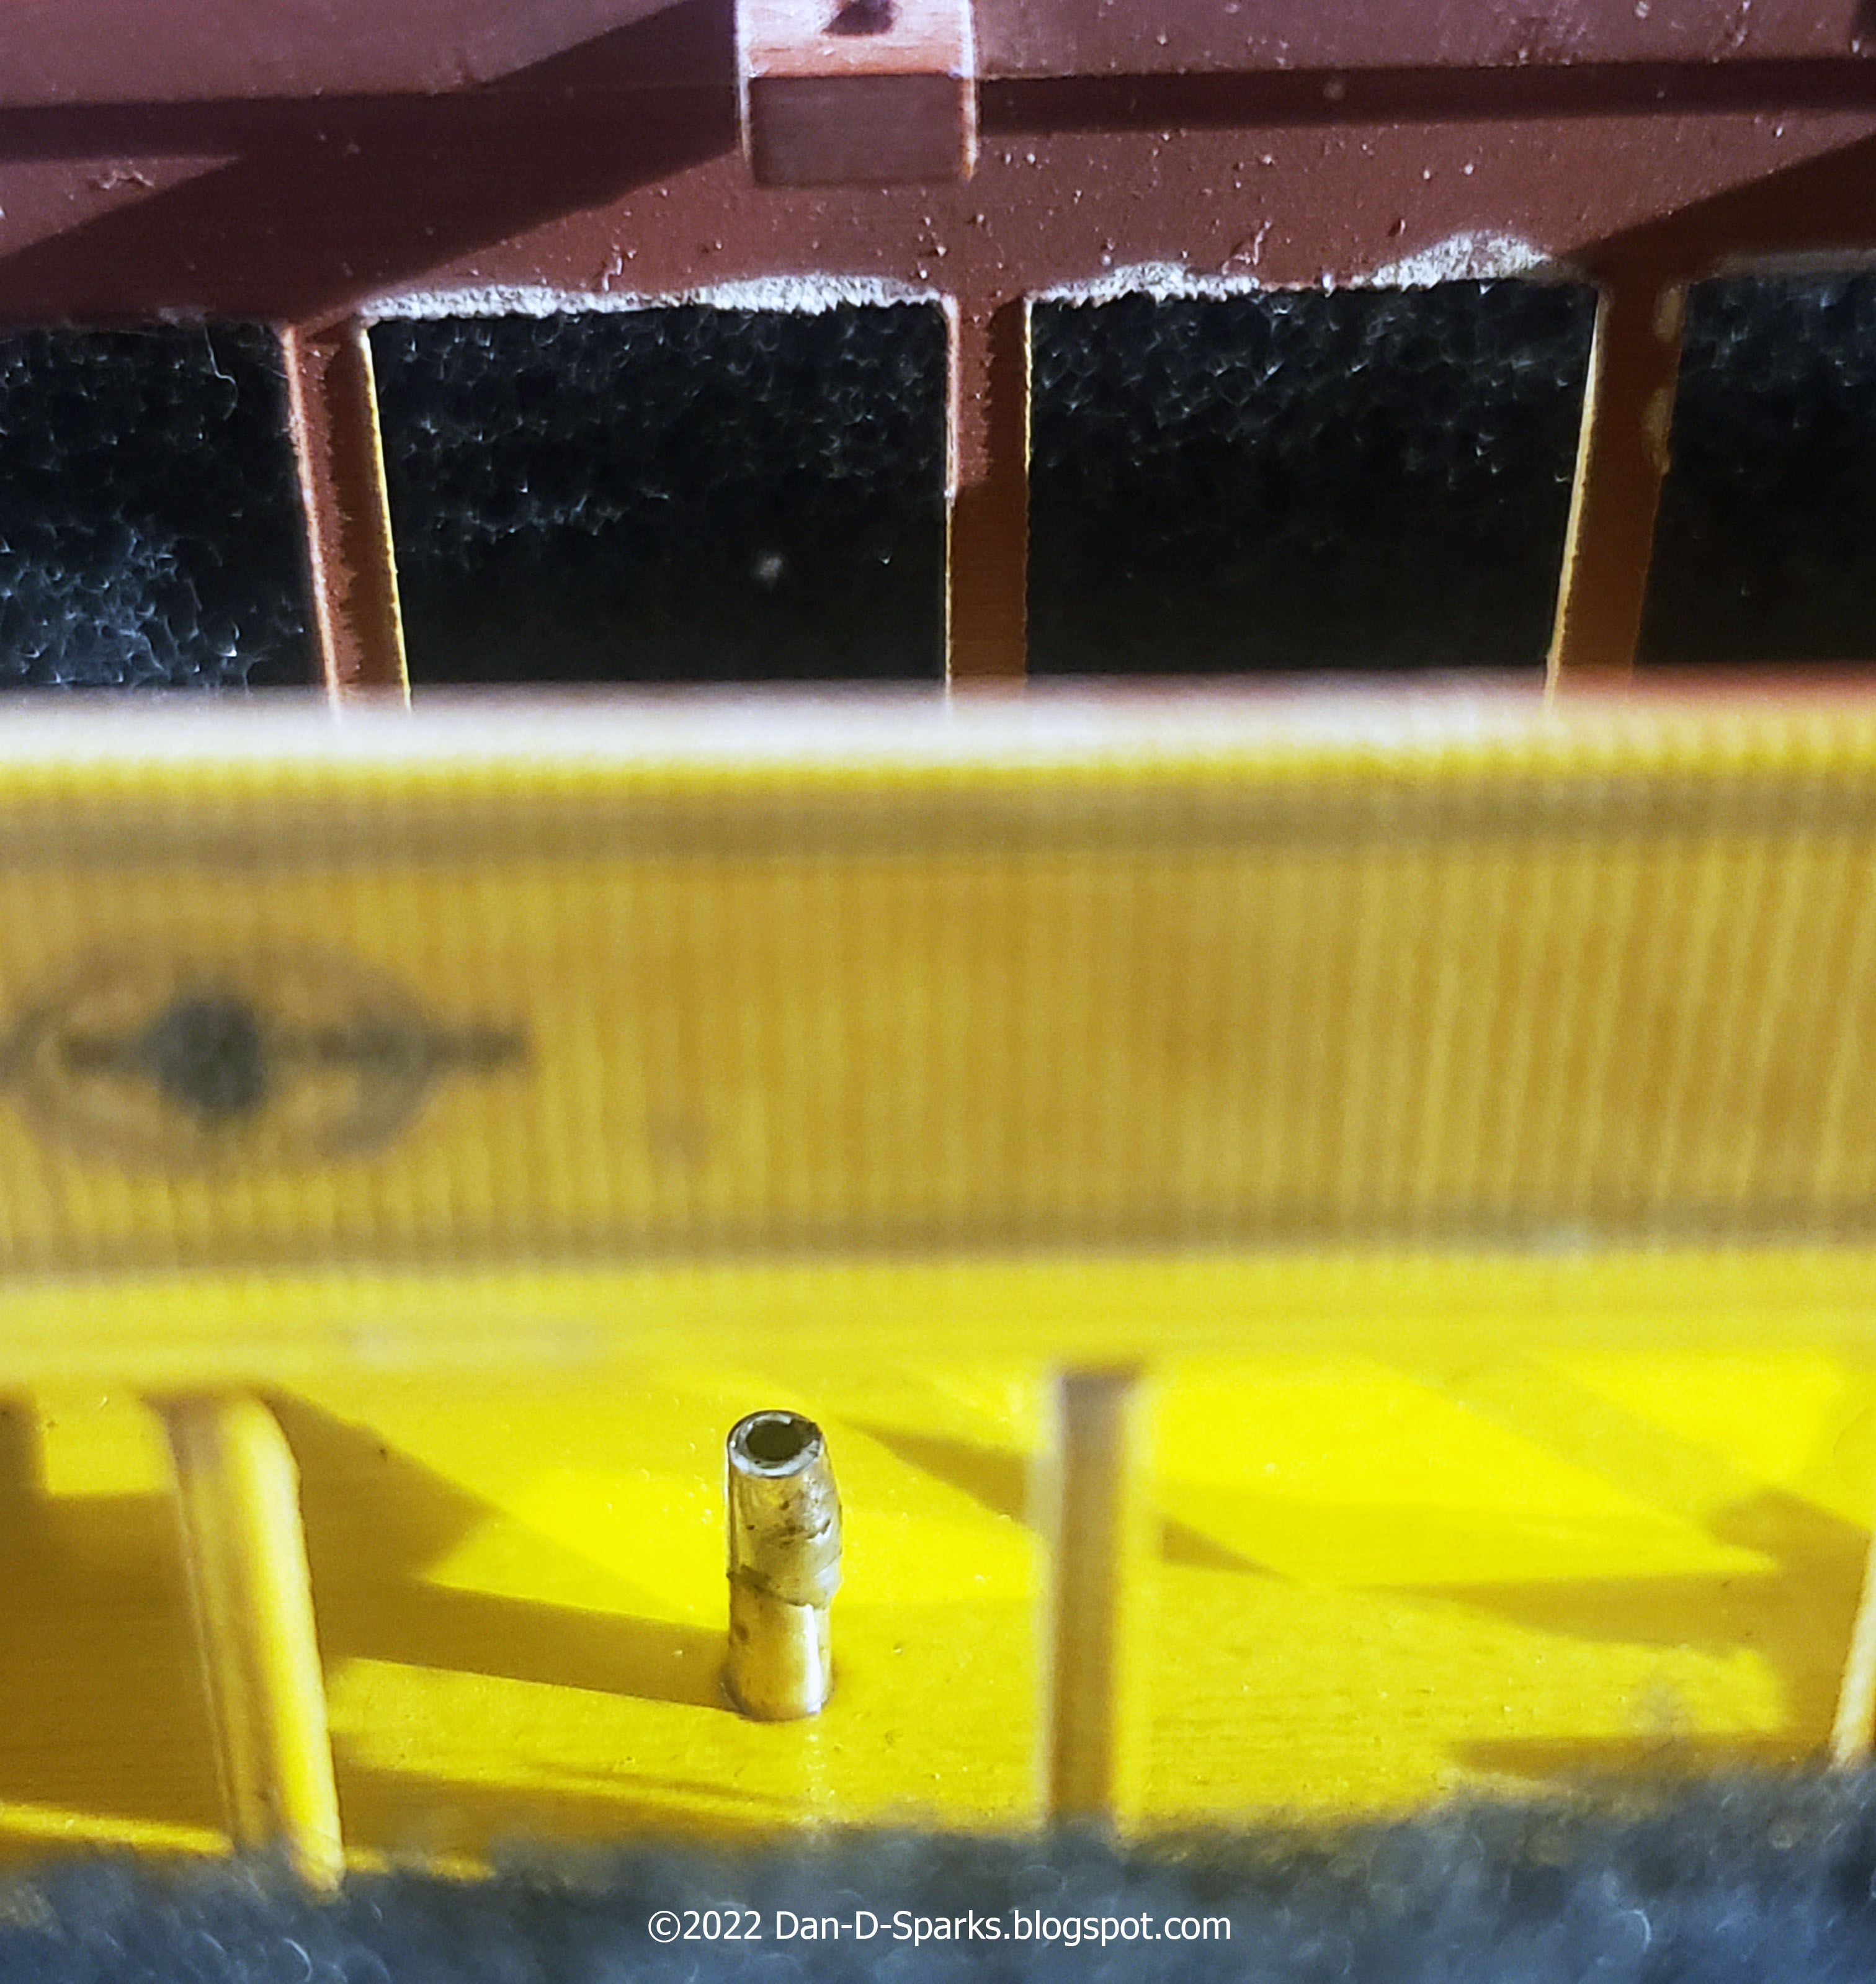
The front end prints of the car include a trolley controller! I painted the top of the controller Metallic Copper.  The Brass paint is used for the grab-handles next to the doors.

It has occurred to me that painting the car may be easier while it's still in its kit form.  This would simplify painting the interior, as well as installing window glass and gate screens.  If this car is a successful runner on my layout I will most likely build some more of these cars. I will give painting and detailing before assembly a try.

Color Theory


After their useful service life, three SDERy Class 1 cars were pushed together to make a "triple wide" house in El Cajon, California. A few years back these cars were "rescued" and one of them was cosmetically restored. But they painted the windows green. I don't think this is correct. 

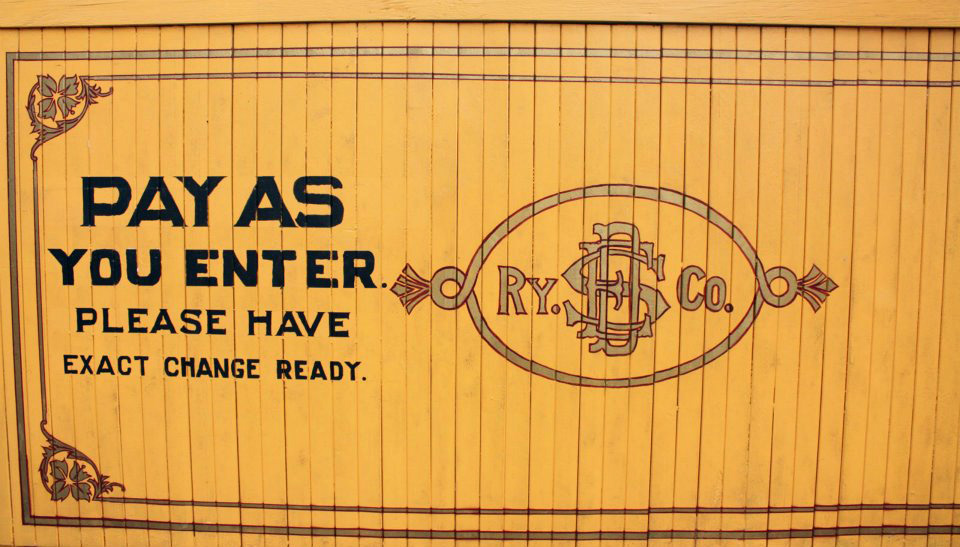
Newspapers and magazines back in the day liked to write accounts of new streetcars. This article written for the Electric Railway Journal by H. M'Nutt, Superintendent of Motive Power San Diego Electric Railway describes the cars; "Selected cherry is used for all doors, sashes, moldings, etc, the surface being rubbed down and left with a dead finish".  
This leads me to believe that the window were painted green by the residence to help the cars feel more "homey". So I stuck to the Yellow and Brown scheme without the green.

Next comes the stripping and lettering.  Which include gold!  So this will be a new venture in decal making for me.

Yes sir!
Special decals!

Dandy

Monday, July 04, 2022

SDERy Class 1's in H.O. Scale!

 West Coast Traction Supply's H.O. Scale San Diego Electric Railway Class 1 Streetcar Shell.

A beautifully designed 3D print kit of this historic car.


I got my wish! Andrew Chier saved me a lot of trouble by designing and 3D printing an H.O. scale model of San Diego Electric Railway's Class 1 streetcar for sale soon on his West Coast Traction Supply shop on Shapeways.


Some assembly required. But it goes together easy enough. Just make sure (unlike I did) that the upper portion of the center divider that is printed with the roof corresponds with the enclosed half of the car (the half with the smaller windows). Though I don't know if the center divider will be able to fit with the drive. We shall see when I get to that part of construction.

Some filing on the prints was required to smooth things out.  Then the parts were cleaned with Dawn dish soap and a sonic toothbrush to remove any oily residue that would prevent paint from sticking to the model.

This is the first time I've built a model with super glue.  I've been weary of using super glue since it can shatter in freezing temperatures. But nobody seems to be having that problem, so I went for it.  After it was all built and looking good I airbrushed on a couple coats of primer. Since the model will be painted a light color (yellow) I used a light primer.

Next comes painting. I'll be painting this car in San Diego's mahogany and golden yellow paint scheme.

Yes sir! Colors!

Dandy