Showing posts with label #9. Show all posts

Monday, July 20, 2026

№ 9 ~ Decoder for De Motor

 Installing a Tried and True TCS KAM4-LED Decoder

with built-in Keep Alive, auto-adjusting BEMF (Back Electro-Motive Force) motor control, Quiet Drive, and built-in resistors to power LED lighting, all in a tiny-tiny package.


Alright, № 9 has been running on the layout since 2020 (and is my best runner!). But apparently I neglected to write a post about installing its decoder. I found this out while performing some maintenance on the car and researched this blog to refresh my memory about it, but it wasn't there! So- here I am to right that wrong.

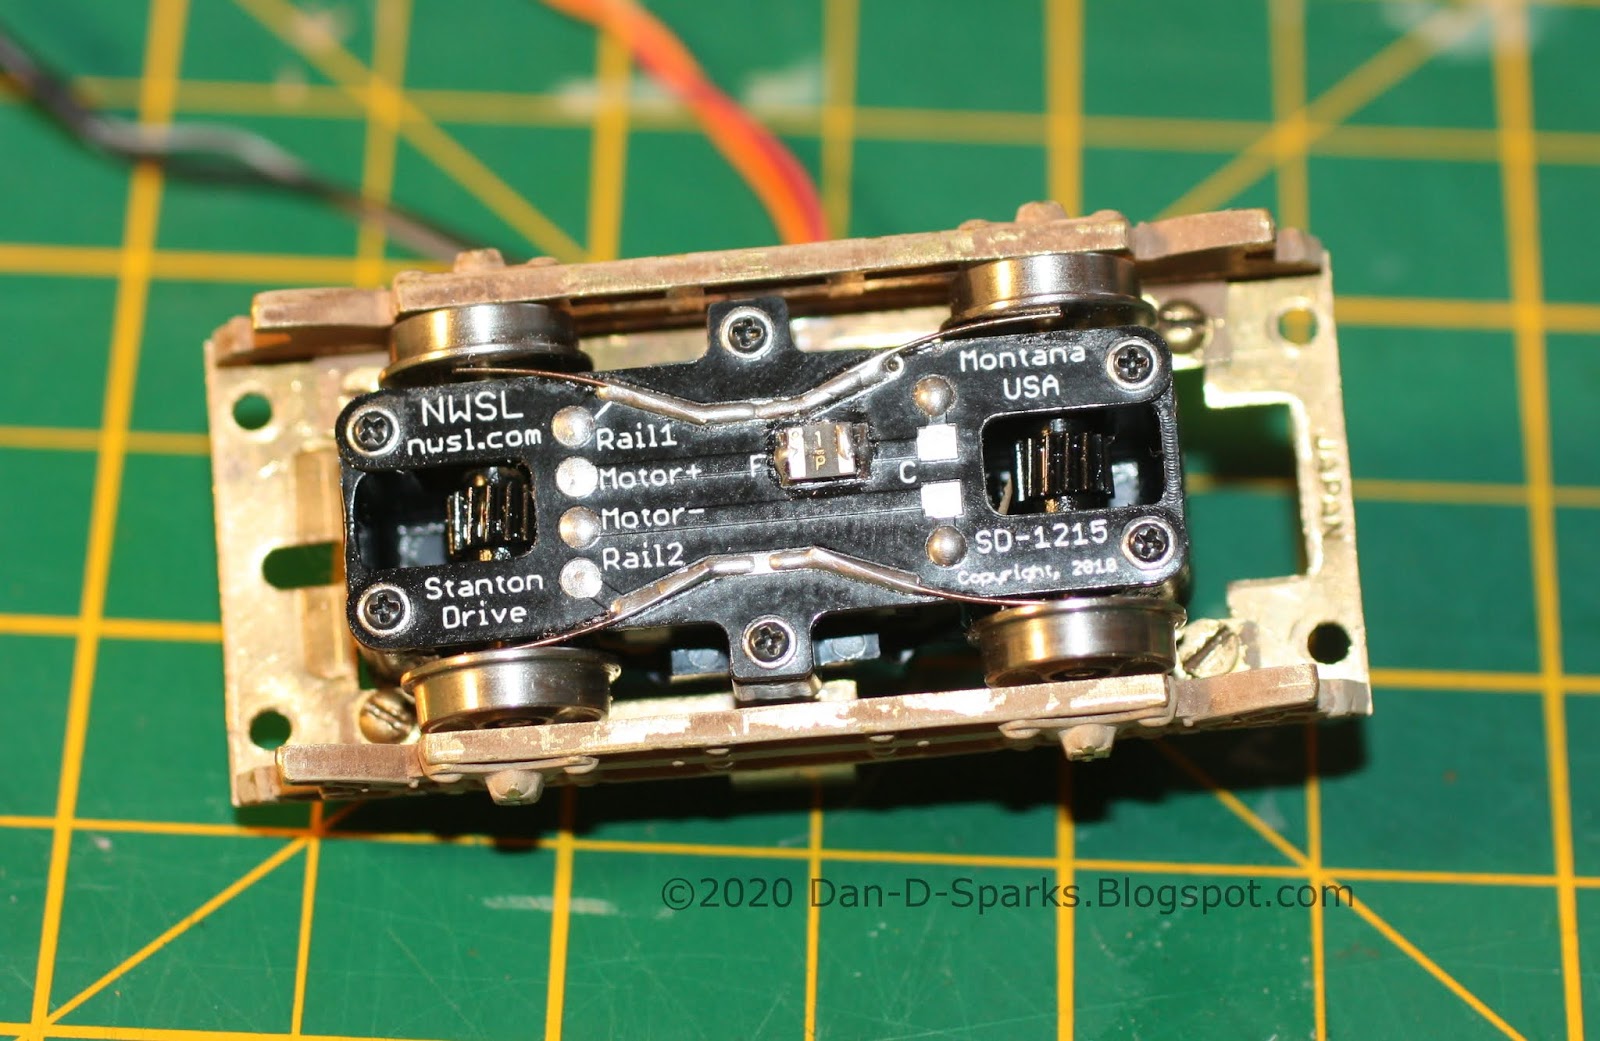
Stanton Drive installed. The two pairs of current collecting wipers can be seen rubbing on the back side of the wheels. One pair is wired to a red wire and the other pair to a black wire.


Grounded. Since I run off the overhead and not 2 rail, all 4 wheels are tied together electrically by simply soldering the red and black wires to the trolley car frame. 

Connected. The orange and grey wires from the Stanton's motor are wired to the decoder. Normally I would use a micro-connector here so that the floor could be disconnected from the body of the car. But I'm not sure that doing that is worth the extra effort. So- we'll see how it goes.


Positive and Negative Power Connections. The red wire from the decoder is soldered to the trolley pole bushing in the ceiling of the car. And the black wire from the decoder is soldered directly to the body of the car that is grounded to the wheels. Back in DC days the trolley pole was the positive (+) and the track was the negative( -) . But DCC is AC so "positive and negative" no longer applies really.

Decodered. The white wire is connected to the front headlight and the yellow wire to the rear headlight and both ground to the blue wire. Those lights I did post about. But the interior lighting I just realized I also neglected to post about! So I'll do a write-up about them when I refamiliarize myself with what the heck it did with them! Then the decoder is tucked up out of the way into the clerestory ceiling and glued into place.

Operation. Between the Stanton Drive and the KAM4, № 9 is a smooth operator.

Yes sir!
A smooth operator!

Dandy


Monday, July 19, 2021

Street Congestification

 Oh! Traffic Around this Town is getting Nuts!

Left to right: Hauler: Velociped, Berkshire Valley: Buggy,  Artitech: Ford T Runabout,  LMB Old Time Trolley. with Preiser and A.C.Stadden figures.

I'm finally getting some nice photos on the layout.
Yes sir! Finally!

Dandy

Thursday, October 01, 2020

The Real № 9 in Action

Old Photo of № 9 Making Its Way Down 5th Street.


or it could be #10, I can't make out a number. ca1890

But I can make out that I put the headlight in the wrong place. This photo shows it on the roof. I wish I had seen this photo sooner. Installing the headlight on the roof would have been so much easier!

Yes sir! It would have been so much easier!

Dandy

Monday, September 14, 2020

№ 9 ~ Guiding Light

 Adding Headlights

The prototype didn't have headlights but on models the headlights are a great way to determine if the car is communicating with the DCC command station without having to run the car out of the carhouse. And since this model has a headlight casting on it, I might as well add headlights.

I should have done this before I painted the car. But the decoder has all these features for directional headlights, so I might as well use them.


Tiny LEDs. I picked up these 1.8mm/2mm LEDs online. I had to trim the leads very short to get it to fit on the car. The body of the LED is painted black so that only the "bulb" lit up.


Black Blob. Soldering the wires to the short leads proved to be tricky. I burnt one LED attempting this. But using a needle nose pliers as a heat sink helped. Then I slathered the whole thing with Liquid Electrical Tape to prevent shorting.  Yes sir! "Slathered"!

Routing the wires from the LEDs down through holes drilled in the floor, superglued along the bottom of the floor, then routed up inside the car to where the decoder will be.

A blop of Micro Kristal Klear for the headlight lens.


"Happiness can be found
even in the darkest of times,
if one only remembers to
turn on the light."

Albus Dumbledore

Yes sir! Remember to turn on the light!

Dandy

Monday, August 31, 2020

№ 9 ~ Official Portrait

The San Diego Electric Railway opened with great fanfare on September 21st 1892!

But by the time № 9 stopped for its photo much of the fanfare had moved on leaving one official, two patrons, a motorman, and a conductor to pose with it.


San Diego Electric Railway № 9

This marks the first time I've photographed a completed scene on my layout. Finally! But the layout is far from complete.

Here's the set up. Pretty simple.

Some people model historic battle scenes, some people model fantastic sci-fi scenes, I model everyday life of old San Diego. What does that say about me? I don't know. But if you know, don't tell me- I don't want to know.


Yes Sir! I don't want to know.

Dandy

Monday, August 17, 2020

№ 9 ~ Cast and Crew

Painting Up Some Folks to Populate Ol' № 9.

The Usual Suspects

These pewter figures by Andrew C. Stadden are beautifully sculpted, highly detailed, and very much in scale and proportion. They don't come painted though, so I'm going to have to make my first foray into doing that.

I glued them to blocks of wood to help make the painting process easier. First I spray primed them and then painted them by hand. There are plenty of videos on YouTube about painting figures that I watched before I started so I would have a pretty good idea of what I was getting into. This guy did a live stream of painting a Preiser figure in real time that helped a lot.

I chose figures that came closest to looking like these guys in this 1892 photo. I thought I would photograph a "reenactment" of this scene with my models.

Yes Sir! A reenactment!

Dandy

Monday, June 29, 2020

№ 9 ~ Going for a Drive

A NWSL Stanton Drive that is.

     In a previous post I had mentioned that motoring this trolley would be the stumbling block for this project. But a Dan D. Sparks Blogspot reader Don Ball had commented that he has had luck with the  NWSL’s new DCC-ready, self-contained underfloor power unit. So after looking in to it I've decided to order one and give it a go.

A quick look, it looks like it should fit (somehow):

Specs:
H.O. Scale NWSL Stanton Drive Model 1215
8'0" Wheelbase
33"/110 Wheels

The 33" wheels are the smallest that NWSL offer. The original wheels on the model are 28". So I had to give a little there.
I also went with the 110 wheel width. Four wheel cars notoriously ride rough, model or prototype. So the wider wheel width should help the car successfully navigate the intersection every time.


Just barely fits! Couldn't be any bigger. The corners of the Stanton almost touch the four screws holding on the side frames. If it was any bigger I would have had to find a different way of attaching the side frames.

The original floor had to be opened a bit to fit the Stanton. I was able to keep the original weight in place. A motor mount was fabricated for the Stanton to screw onto and hold it at the proper height.

An important thing to note is that the Stanton is not symmetrical in length. The housing was designed for two different wheel base sizes (probably 8'0" and 8'6" in this case). I have the smaller size so one of the wheel sets is closer to the pivot than the other. So Note to Self: The motor mounts one way (wires opposite side of pivot from the weight).

It's in there! What was once a formidable task is now in the past. Relief. Now it's time to move forward. Next: Decoder and a Pole.

Yes Sir! Keep moving forward!

Dandy

Monday, June 22, 2020

№ 9 ~ Decaled

Pinstripes and Neat Lettering Sure Add A Lot of Elegance to a Car.


For all those building their own SDERy #9, I make available to you the decal artwork. Click for the hi-rez version:


Well I'm pleased with how well its going with this car. So I have decided to press on with bringing it to fully operational completion. The next step is to see if I can fit a decent motor in it. Don Ball suggested a NWSL Stanton Drive for it, so I'm going to look in to that.

Yes Sir! Elegant!

Dandy

Monday, May 18, 2020

№ 9 ~ Straight Outta Paintshop

№ 9 Gets A Fresh Coat of Yellow and Brown Paint.

TruColor Reefer Yellow for the body color, Roof Brown for the trim, Foundation for the roof and trucks.

But first, the brass was cleaned and primered with TruColor Light Primer (to help the yellow show up).

After the interior and body were painted, I masked the whole thing except for the window frames and platform for the TruColor Roof Brown. 

Yikes! A lot of paint pulled off with the unmasking! Either: TruColor is a delicate paint, or I didn't wait long enough for the paint to cure (24 hours), or I should have sprayed a sealer coat on first. Anyway, touch ups required.

But, the whole reason for this exercise, what initiated this project in the first place, was to try out TruColor Reefer Yellow as SDERy Yellow. And you know, its pretty darn close if it doesn't actually nail it!

Yes Sir! Might of nailed it!

Dandy

Monday, May 04, 2020

LMB Old Time Trolley

Sizing up an Old Model to Rebuild into SDERy #9

Last post I determined which cars I'm going to use for my fleet. But as I was retrieving them from my collection I came across this old Old Time Trolley "basketcase" model I purchased from George Jones. My first thought was to try out some Tru-Color Reefer Yellow on it to see if its a good color to represent SDERy Mission Yellow. But the more I look at this car...

 
I believe this is be an old LMB "Open End Trolley" model from c1961.

The model is very similar in appearance to SDERy #9 and #10.

Built by Brill in 1892, #9 and #10 ran for 17 years before they were retired in 1909.


A side-by-side comparison reveals that the windows on the model are too short as well as is the roof. Other than that though its pretty darn close.  I think that the model captures the feeling of the prototype quite well.

So into the Pine-Sol bath it went to strip it of paint.

I also fabricated route signs for the sides of the roof.

I guess I'm moving forward with this project! But I'm not sure how far I'm going to be able to get with it, motoring this model seems to be a stumbling point. But so far I'm committed to painting and decaling it. After that, we'll see where this goes

Yes Sir! We'll see where this goes!

Dandy