Put on your pajamas. Brew yourself a pot of coffee. Make yourself really comfortable, and get ready for a real snooze fest monologue! For I present to you-
Dan D. Sparks thoughts on San Diego Electric Railway Mission Yellow!

When I was in my young 20s devouring historical photos, I remember a conversation in which it was suggested that black and white photos actually contain color information, we just need to figure out a way to extract that information.
Now here we are over twenty years later and that technology seems not to have materialized. So here I am once again agonizing over historical photos trying to determine what color San Diego Electric Railway yellow is exactly. The 100+ years old black and white photos offering little clues. But, clues do exist.

Clues come in different forms. I know that they were yellow from early written accounts describing the new trolleys as being a “golden yellow”. Though I suspect some embellishment with the “golden” part, the delighted reporter’s feelings creeping into his story. But then again, maybe they were golden yellow. I also have come across the description “mission yellow”, but there were no standards then, as now, for naming colors. Paint manufacturers can pretty much name their colors whatever they want. And what one manufacturer calls golden yellow can differ from another manufacturer’s golden yellow. I’ve seen pictures of a Union Pacific streamliner where every car was a different shade of “armor yellow”!

Car 54, there you are!
Clues that can be gleaned from b&w photos are the tone of the color. In this photo of car 54, I’m willing to bet that the ladies blouses are pretty darn close to “virginal white”… white, white. I’m also willing to bet that Kodak was using its familiar Kodak yellow color for its advertisements as seen on the right side of the photo. So I know that car 54 is not white, and it’s not bright Kodak yellow. This photo seems to support the “golden yellow” description, a little darker yellow. We also have to consider fading. Bright colors were more difficult to achieve and maintain back then, they would fade fast, especially in the California sun, thus lightening the tone. But! These trolleys were work horses traversing these dirt streets day in and day out, day after day, rain or hot, dusty shine. So they were getting pretty dirty, thus darkening the tone! So in essence, they were getting grayer.

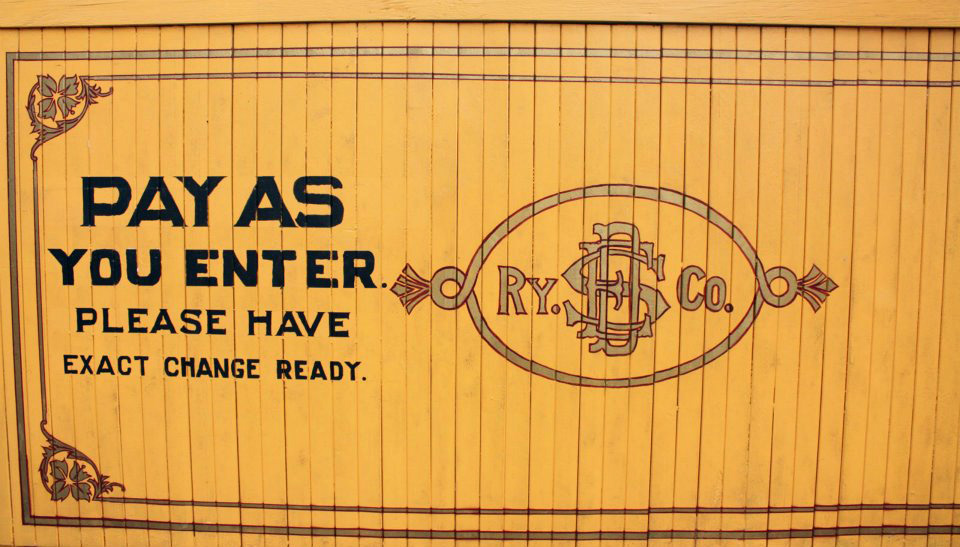
As a reminder to not over think it, check out this tonal range of yellow! From very dark, to medium, to practically white! I suspect SDERy Co., like any other company, wasn't overly consistent with their company colors.

And then there are the tinted postcards. The thing to remember about tinted postcards is that they were tinted by hand, by memory, in the studio, not on location. And, they used whatever bottle of yellow tint on hand, no attempt to match the color exactly in the interest of time and because well... nobody cares or would even notice if it didn't match exactly. These two tinted photos of SDERy double-decker car #1 (taken at two different locations but almost exactly the same angle) depict two different tints of yellow! Did one studio take more care in matching the color? And if so, which one?! So frustrating!

Another thing to remember about tinted postcards is that they too are subjected to fading and getting grimy with handling over time. So they too are getting greyer. Oh! And not to mention generational copies! These postcards are not only getting greyer, but then were scanned by I don’t know how good of a scanner or camera, in I don’t know what kind of lighting conditions (incandescent lights make things appear more yellow, while florescent lights push things more towards the green end of the spectrum, etc…), and then subjected to whatever sort of enhancement with Photoshop type of programs, and saved with I don’t know what kind of settings, and then finally ending up on your screen which looks different from my screen! ssSSOOoo frustrating!!

The ultimate is to find an actual paint manufacturer paint chip. While very rare, I have known it to happen (Last year with Tiffany refrigerator cars “moss green”.). But, unfortunately, not with the San Diego Electric Railway.

The next best thing is a well preserved car from the era. A San Diego antique dealer rescued three vintage SDERy class 1 cars from a home and made efforts to protect them. Though not well preserved, these cars are yellow. But did the home owner paint them that color? Hopefully the cars were protected from the elements and the yellow is genuine. I haven’t been able to determine which.

Car 54! Your still here!
I visited briefly SDERy 54 at the museum at Balboa Park, but no one there could give me any answers on the authenticity of the color they used. To me, the semi restored car 54 lacks the elegant color schemes that were typical of its era. But that might just be because they painted the whole thing yellow, where as I suspect that the trim and seats were originally the natural color of Mahogany. Very much similar to this authentically restored San Fransisco streetcar:

Now this is an elegant paint scheme! The chrome yellow with brown lettering and red numbers with a dark drop shadow on them. And the natural mahogany seats, nice. I bet this comes real close to what the old San Diego cars looked like.

Another surviving San Diego car is this car now at the Orange Empire Railway Museum in Perris CA. I have never visited this car, so a trip to the OERM would be prudent. But a few factors worry me about the authenticity of the yellow on this car. It was originally a Salt Lake car that was brought in, like many other cars from around the country, to help out with the war effort in San Diego. Is that SDERy yellow on the front? Or is that a remnant from its Salt Lake days? Or did someone else put that on there? And if it is SDERy yellow, how much of the orangy color is rust showing through the yellow? How badly has it faded? F-r-u-s-t-r-a-t-i-n-g.

George Huckaby of the Southern California Traction Club is the only one I know of that has ever painted a model in SDERy yellow. I asked George about it and he was kind enough to email me his recipe that he and David Garcia came up with:
"Floquil UP Armour Yellow (110066) – 10 parts; UP Light Orange (110068) – 10 parts; engine Black (110010 ) 1 part; I make no guarantees as to correctness. This came about based on my own research and opinions of railroaders who I respect. I used this color on my car. See enclosed photo" (above).

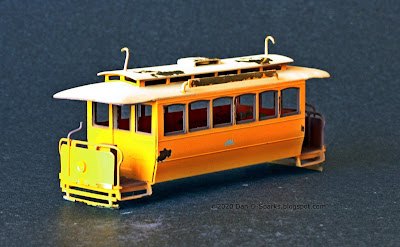
Okay, so that’s it for evidence and clues that I have. Now it’s time to make an educated guess. I’ve taken some Scalecoat brand yellow paint chips and took a look to see what they look like in gray scale. After comparing the color chips with the color (and colored) photos, and the gray scaled chips with the b&w photos, I’m thinking that the Scalecoat S43 Erie Lackawanna yellow is looking to be just about right.
I’m pretty confident with my choice. But I might change my mind when I actually see it on my model. I’ll have to take a look and then determine any adjustments. Then I will be absolutely certain of my choice. The only way to change my mind and make further adjustments is if someone comes up to me with some actual paint chips and proves me wrong. Yessir! Prove me wrong!