Cleaning the Overhead with a Conductive Contact Cleaner and Keep Alive Decoders to "Track in the Dirt and Track out the Clean".
In the
last post I wrote about the tools and cleaners I've tried and the ones I'm actually using. This post I'll address how I'm using them to clean the hard to reach track and overhead.
Car № 107 got its decoder before the availability of KeepAlive decoders. So if the track isn't perfectly clean its lights will flicker.
Some years ago there was a lot a debate over "Wet vs Dry" track. Some of the cleaners (like
DeoxIT) conduct electricity so why not just leave the track wet with the stuff? If the track get dirty the trains will still run. While others argue that dry, shiny track is the way to go. Personally I find that starting out wet and working my way towards dry works out best for me.
Attack plan. First of all, I start with a general cleaning of the easy to reach outside loops leaving the hard to reach intersection for last. I'll run a car on a loop and address any stalls or hesitation issues until the loop is running well. Then I'll move on the to next loop until they are all running well. Then its time to attack that intersection!
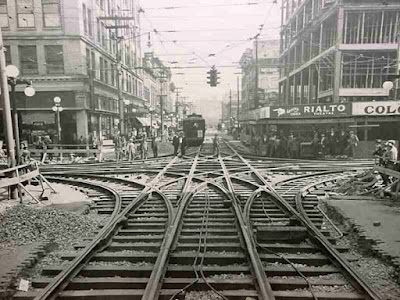
As you can imagine, the intersection is the last place I want to try to retrieve a stalled streetcar. That overhead wire is like a cage. So clean track and overhead is quite desirable there. Cleaning the track through the overhead with the
Double Headed Cotton Swabs is straight forward enough. But that overhead! So to clean it I developed a "trick". Let the cars themselves clean the overhead:

This is where having cars with "Keep Alive" decoders come in handy. First I'll give the capacitors in the decoders time to charge up (~20mins) while they run around the outside loops. Then I'll place a drop of DeoxIT on the contact wire just before the intersection. Then throw the turnout to route the car into the intersection. The pole will collect the DeoxIT and spread it on the wires as it goes through the intersection. The "Keep Alive" will keep the car moving through the dirty overhead until it reaches the clean track of the next loop. Each time the car traverses the intersection the trolley pole collects dirt from the contact wire and then spreads it to the clean contact wire of the outside loops. All I do is keep cleaning the track and contact wire on the easy to reach outside loops. The cars track in the dirt to the outside loops and track out the clean into the intersection. And of course, I'll clean the cars wheels and poles from time to time.

Once the track and overhead is clean enough to run my cars that don't have the "Keep Alive" decoders well I'll begin the process of drying the track. Leaving the track and wires wet with DeoxIT will just collect a thick layer of gunk and when that dries its difficult to get it off. In the photo above, the upper rail is covered with some gunk that the cars tracked in from the intersection. While the lower rail has been polished dry. That dry, polished track and overhead throughout the layout is the ultimate goal.
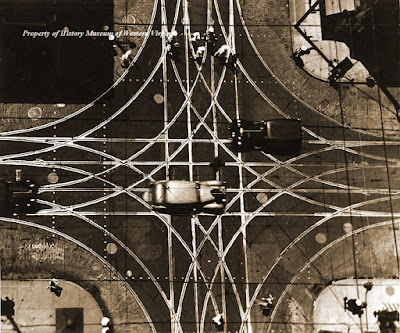
San Diego Electric Railway wagon outfitted for overhead wire maintenance.
So to recap:
DeoxIT on double ended cotton swabs for a general cleaning of the track and overhead as well as the poles and wheels on the cars.
Let the cars track the DeoxIT around on the rails and overhead until the layout is running smooth.
Use the double ended cotton swabs to begin the process of drying and polishing of the track, overhead, poles and wheels.
The longer the layout runs for the cleaner it gets.
I've been using that method for years. So of course as soon as I write a major blogpost about it a "new" product comes along that's highly recommended. I'm going to give this NO-OX-ID "A Special" a trial and see how it compares to my usual method. If I find significant improvement with it I'll let you know.
Yes Sir! The cleaner it gets!
Dandy

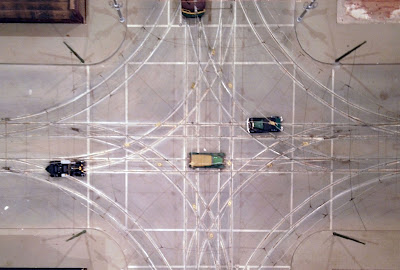
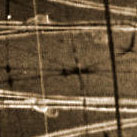 The overhead wire geometry is next to impossible to make out. It's easier to see its shadows. Is this four contact wires converging on one frog!?!