Showing posts with label poles-trolley. Show all posts

Monday, December 05, 2022

#135 ~ Precision Instrument

 Trolley Poles and Hold Down Hooks

Fabricating some trolley pole hold down hooks.

Last time I already installed the trolley pole bushings but then I goofed and installed the weights before installing the trolley pole hold down hooks.  

But looking at the prototype hold down hooks, I may have not goofed at all! I think I can work with this.

For the Trolley Poles I used Miniatures by Eric Traditional Trolley Poles HTP4.

The hold down hooks are fabricated using some .015x.042 Brass Flat Bar from Detail Associates.

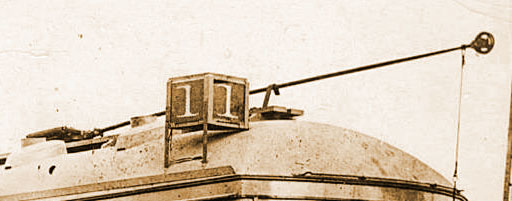
The hold down hooks need to be at a height so that the trolley poles are horizontal when in the stowed position.

The .015x.042 brass bars slipped between the roof and running boards nice and snug.  A little epoxy will hold them in place.

I think I got the angle just right!  I painted the hold down hooks black and glued them in.

Ooh! Nice!  #135 is looking like the precision instrument that its meant to be!

Yes sir!
The precision instrument its meant to be!

Dandy

Monday, March 18, 2013

#426 Project~ Energizing the Diablo

With the Diablo Mechanism firmly installed, its time to wire it all together.


I find soldering the wire to the trolley pole base a little tricky. The wire attaches to the brass bushing which inserts into a plastic insulator. The wire can't be soldered on ahead of time because then the bushing would be too fat to fit through the plastic insulator. The only solution I've come up with so far is soldering it in place fast before the plastic has time to melt.

The bushing is prepared ahead of time. First by roughing it up with a Bright Boy so that its clean and etched, ready to accept solder.

Then the bushing is tinned (hot solder flowed on). I had to keep it thin so it could still be slid through the plastic insulator. 

Then the wire is shaped and tinned as well.

Then I line everything up, add some flux and then hit it with the hot iron. Hopefully the wire and bushing will melt together before the plastic gets too hot. Remember to clean off the flux residue with some alcohol. Give the wire a tug to make sure a good connection has been made.

Each wire from the two bushings (double pole car) connect to one end of a Micro-Mini Connector plug from Miniatronics (50-001). The other plug of the connector connects to each pole of the motor. To help keep wires organized and out of the way of moving parts, one of the plugs is glued to the top of the motor (above), and the wires are bent accordion style. A rubber band secures the plug in place while the glue dries.

Testing the electrical connections is a simple matter of stuffing one power pack lead into the hole of one of  the bushings and the other lead into the other bushing. Give it some juice and (if all goes well) the car should roll across the work bench (which it did!). So now were ready for the test track. Yes sir! We are ready for the test track!

Dandy

Monday, January 30, 2012

Niles Project ~ Trolley Poles

Give a man a fish and you have fed him for a day. But give a man a pole, he's a trolley fan for life!
Identifying, preparing and adding trolley poles to #107

 Looking at historical photos reveal that the Niles cars were equipped with Form 1 trolley poles that were common with 1895 - 1920 era streetcars. They have that "folded back" look to them.

The HT-P3b poles by Miniatures by Eric fit that bill just fine. I bought mine through Custom Traxx. That 32 bucks per pair price tag knocked me for a loop. But they are precision instruments and Eric does an outstanding job with these. I'm building my cars to perform and I can rely on these poles to do just that. For #105 though, I will be rebuilding the Suydam poles, which makes for a less expensive alternative. So stay tuned for that post later.
Trolley poles are constantly flexing so paint doesn't do too well with that. The best solution for that is Blacken-It. Blacken-It is a metal oxidizer. The blackened brass will still conduct electricity and won't flake off. But...

... Remove the steel springs first! The Blacken-It corroded my springs clear through! But it did a mighty fine job of blackening the rest of the pole assembly. So remove the springs, soak the poles in Blacken-It, and then replace the springs.Then you'll have a fine looking and fine working trolley pole.
That is the beauty of these blogs- you can learn from my mistakes, Yes sir! Learn from my mistakes!

Dandy


Monday, January 23, 2012

Module Spotlight ~ Trolley Crossing Guard Jct.

Getting fancy with the 1' x 4' module. SCTCs Module 972. The Trolley Crossing Guard Junction Module.
The Southern California Traction Clubs module 972. Built in 1997 it was the 2nd module built that year.

There was a need to transition from the center street running of module 971 to a private right-of-way. So this module does just that with a highway intersection as well as a steam road crossing.

The divided highway matches up with module 971. It terminates at the highway that crosses the module at an angle. The tracks of a steam road also cross here and a small elevated interlocker helps guard the junction. The diverted highway freed up some space on the rest of the module for some scenery. In this case a siding and a substation.
With the junction being a prominent feature on this module, the SCTC members decided to have some fun with it.
 Remember those old movies where if a car breaks down, inevitably it stops on railroad tracks? Then there would be the sound of a train whistle~  Its happened to the best of them...

Harold Lloyd...

Buster Keaton...

... and of course, the Keystone Kops. 
And we know the outcome. Their vehicles were no match for the locomotives that rendered them to a state of less than Blue Book value.
Now in the real world, if a streetcar was to stall because of dewiring, the last place you would want it to come to a stop is across some steam road tracks. A streetcar wouldn't fare much better than the Keystone Kops Kruzer against a speeding locomotive. This was a very real danger to some traction companies. So they devised Trolley Crossing Guards.

Here is a traction line junction with a steam road in Toronto with trolley crossing guards in the overhead. Should the streetcars pole dewire at this spot, the shoe would catch in that wire mesh covering the contact wire. That wire mesh is energized and would power the car far enough to clear the crossing and out of danger.

So the builders of this module thought that that would be a pretty nifty feature to model. And it does get noticed by the public who often ask about it.

Pete DeBeers Mt. Lowe car speeds through the junction without fear of being smashed to smithereens should it dewire under that trolley crossing guard.

A fully detailed and lit substation rounds out a fun 4 square feet of model railroading. Yes sir! A fun 4 square feet of model railroading!

Dandy

Wednesday, March 10, 2010

Birney Project ~ Phun With Fysics

 After a test run on the Southern California Traction Clubs city modules, the drawbacks of single truck trolleys became apparent on ol' 301.

Sir Lord Dr. Isaac Nudeton Esq III PHD.

Nudeton's 3rd law of force states: "The force of the trolley pole pressing up against the overhead contact wire is equal and opposite to the force pressing down on the trolley car.". Who knew Nudeton was a trolley fan!
Well that force was evident on the Birney car. The pole pressing down on the back of the car coupled with the fact that there is a weight behind the decoder puts more force on the back wheels than the front wheels. So the back wheels become in effect, a fulcrum. In other words, the trolley wants to do a wheely.

And a trolley that wants to do a wheely doesn't want to take curves, it wants to keep going straight.

So the solution is: More weight in the front of the model, get those front wheels down so that the flanges will help the trolley get around corners.

So after making the bold statement of "There is officially no more room for anything else in this model!", I have to find more room for more weight in the front of the model. Yes sir! Have to find more room!

Dandy

Monday, October 19, 2009

Birney Project ~ Hold Down Hooks

Fabricating New Trolley Pole Hold Down Hooks For The Birney.

Trolley poles pointing downward is a bad thing. The hold down hooks are too short. So I'm going to fabricate some new hooks that are taller and more prototypically correct.


Using a cutoff disk on a Dremel, I cut off the old hooks.

Since the trolley poles are wired to the leads of the motor, the hooks need to conduct electricity from the brass body of the car to the pole. So I had to remove paint from where the hooks will be soldered to the car.

To fabricate the hold down hooks, I started with .010" x .030" brass bar stock folded in half.

Using a nail (I found a nail that was the same diameter of the old hook loop) I looped the brass around getting a nice curve by using pliers and a screwdriver to work the brass into shape.

Add a reverse curve in the brass so that the apex of the loop is in line with the main shaft of the hook. Solder only the loop, the reverse curve and part of the neck together.

Then bend the legs out and fold in the feet that will be soldered to the base. The hook assembly is now done.

Solder the hook assembly to the roof boards and trim the feet. Give it a tug to confirm a good connection. Now its time to paint the hooks and while I'm at it, I'm going to right a wrong...
Roof boards were never the same color as the roof. Roofs were usually of canvas or thin sheet metal, so you don't want to step on it or you'll fall right through or bend the heck out of it. So roof boards were installed so that workmen maintaining the cars could stand on the roof without damaging it. They were usually made of wood and were painted a contrasting color so the workmen could see where to step out of their peripheral vision. My hands are pretty steady, but not at this tiny scale. So I masked off around the boards.
Brushed on some Scalecoat Roof Brown on the boards and painted the hooks black. Some weathering will kill the shine on the boards.

Now that's more like it! The car looks much better and the horizontal poles are getting a much better electrical contact with the hooks now. Storing the car with poles on help keep the connection from oxidizing. Got to do everything you can to keep good electrical connections throughout if you want to keep them doggies rollin'. Yes sir! Keep them doggies rollin'!

Dandy


Friday, April 03, 2009

Birney Project ~ Wiring for Trolley Pole Reverse

Fortunately, the Birney cleaned up nicely from the April fools day disaster ;-P. So now we can continue with the wiring. I'm going to use a nifty technique known as "Trolley Pole Reverse":

Trolley Pole Reverse wiring is used with live overhead. The direction of the trolley is reversed by simply switching poles, no need to switch polarity in the track! The way it works is; one pole is wired to one of the motor leads, and the other pole is wired to the other motor lead. When one pole is up in contact with the positive overhead, the motor lead it is wired to becomes energized with the positive electrisicles. The other pole is down making a connection with the holddown hook on the roof. That hook is part of the metal car body that is energized with the negative electrisicles from the wheels in contact with the negative rail. So that pole is energizing the motor lead its wired to with the negative electrisicles, making a circuit! Then, switch the position of the poles so the first is down and the other pole is up, the polarity of the motor leads are reversed and the trolley runs in the opposite direction! Cool huh?

Utah Pacific #CLU-96 Constant Lighting Kit wired in series with the motor provides 1.5 volts for reversing headlights and taillights as well as constant lighting for the destination board and route number signs. I had to omit the interior lighting, the unit is at capacity with the 7 bulbs its already lighting. Maybe someday I'll be able to figure out how to light the interior but, if I was to do it all again, I would go with LEDs. They last much longer, I'm not looking forward to fishing out a burnt out bulb out of the spaghetti of wiring shown above. The bulbs are glued in place with Elmers White Glue. Elmers is also used to glue the wires to the ceiling so that the dont hang down in the windows. Elmers hold really well but is also easy enough to remove.

2 Pin Micro Mini Connector from Miniatronics (Code: 50-001-02) allows the motor/truck assembly to be detached from the body for maintenance. One pin is wired to one trolley pole and the other pin wired to the other pole/constant lighting module. The negative charge from the rails transfer through the mounting screws to the trolley body and hold down hooks.

Add some power and "bling"... yessir! "Bling"!

Dandy


Monday, March 30, 2009

Birney Project ~ Trolley Poles

Success! Finally. After expensive trial and error searching for suitable trolley poles for the Ken Kidder birney, I finally found a pair that work!

HO scale PCC Form 11 Trolley Pole from Miniatures By Eric available through Custom Traxx.
HTP2s includes Poles, two brass pivots, and two plastic insulators for $32.00.


You know, its a good thing model railroading is a rich mans hobby, keeps the riffraff out ;o)

I treated the shiny brass poles with Blacken-It. This actually turns the brass black but won't chip like paint, AND still make electrical contact. Which is good, because the car is going to be wired for "trolley pole reverse" which means the poles need to make good contact with the hold down hooks on the roof.

Now with the poles installed, we can finally get the electricicles happening. Yessir! Get our electricicles on!

Monday, November 17, 2008

Birney Project ~ Darn It All To Heck!!!

The close proximity of the two trolley pole mounting holes are causing the trolley pole bases to interfere with each other. As usual, I found this out the hard way.

So I found these poles where the base is facing the opposite direction! Perfect! Problem solved.


Whoops! Somethin' wrong here. These poles were designed for PCC cars and I think that the roof of PCCs curve down where the poles attach, angling the pole. So the upward angle of the base (which would be level on a PCC) prevents the pole from laying flat on the Birney car. It can’t reach the hook! Dang it! So it’s back to finding a suitable pole. This can’t continue for too long because poles are expensive!!! (I can’t return these poles because I had to trim the bushings to fit the Birney.). These setbacks are really blowing my modeling budget. Dang it! Yessir! Dang it all the heck!!!