Monday, July 29, 2013

Testing, Testing, 1,2,3, Testing!

Working out all the kinks in the track before the overhead goes up.

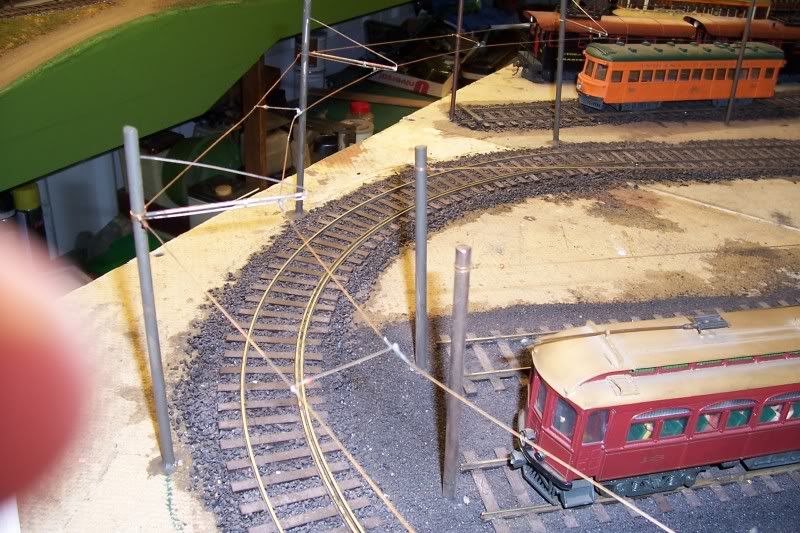
Making adjustments to the track after the overhead is installed would prove to be very difficult. Since trolley track usually isn't electrically insulated for two rail operation, testing the trackwork before the overhead is installed requires some other arrangement.  Southern California Traction Club member John McWhirter built a pretty darn nifty battery powered car that will do just that.  I was able to borrow that car to test out the track on my home layout, especially that intersection. Sure enough, it found some sections of track that needed some attention:

Thank you John for the use of your car (which we here at the Dan D.Sparks Plywood Development and Transportation Co. car shops have christened the "McWhirtagig"). It has been very beneficial toward achieving our goal of "0 derailments" operation. Now, back to testing and adjusting. Yes sir! Back to testing and adjusting.

Dandy

Monday, July 22, 2013

Wonderful World of Color

Painting the Streets and Sidewalks
 I've been staring at plywood and plaster for so long that even the new concrete coloring looks exciting!
 I grabbed some buildings and posed this little scene. Two of the streets on the layout represent the pre-paved era of streets. So they were painted Floquil Earth.

 But for the most part the rest of the layout is painted Floquil Concrete. And of course Floquil came out with "Aged Concrete" right after I painted it! But it doesn't really matter anyway because...

Another case of "if I were to do it again". Because if I were to do it again, I would have used Durhams Water Putty tinted with concrete coloring. In the photo above the effects of track cleaning and chipping on painted plaster can be seen. Bright white plaster peaking through. Tinted water putty would fair much better.
You guys are so lucky to be learning from my mistakes. Yes sir! Your so lucky!

Dandy

Monday, July 15, 2013

Paving the Way

Pouring the Streets and Sidewalks. 

Extensive testing of the track is essential before its covered with street paving. Especially that intersection. Making revisions to the track would be most difficult when its buried in plaster. Plus its fun to just run the cars around too!

It seems logical to me to pour the sidewalks first. I used angle stock that was the thickness I wanted the sidewalks to be. Where the sidewalks curve at the corners I cut slots in the angle stock so that it could bend (sorry about the dark photo). Then the angle stock is spiked down to create a trough to pour the plaster into. 

I used lightweight hydrocal, but if I was to do it again, I would use Durhams water putty. 
Originally designed for DC operation, the track is cut into electrical blocks. In the photo above you can see where the wires come up from under the layout and soldered onto each rail of each block. That also has to be tested for electrical continuity before being buried in the plaster.
 Once the sidewalks were in and the track passed inspection, I started in on the streets. Stripwood equal to the height of the rails were glued against the sidewalks (where the gutter would be). Then plaster could be be poured in between. The stripwood and rail would be used as a guide for a paint scraper to smooth out the plaster. I stuffed thick string into the flangeways to keep the plaster out, but I think I could have just masked if off with tape.

Interestingly, all the spikes rusted and soaked through the plaster. But I don't think the strength of the spikes were compromised. Besides, everything is now held firmly in place by the plaster. Derailments should be nonexistent since the whole layout is basically a rerailer!

Finally I sanded down the all the streets and sidewalks with a block sander to make it all nice and smooth. I don't want any pour marks showing. I also scribed expansion joints in the sidewalks before the plaster got too hard.

I can't get over how different the layout looks now. It's all looks so neat and tidy. Now I have got to get some paint on it. Right now it looks like a winter wonderland. Yes sir! It looks like a downright winter wonderland!

Dandy


Monday, July 08, 2013

Gandy Dancing in the Streets

Layin' Track 

Originally the layout was built 4 feet by 4 feet. But the curves proved too tight, the streets were too tight, the city blocks too small, the sidewalk corners had to curve to clear the intersection tracks... it just wasn't working. But just by adding another 6" to each side of the layout made all the difference in the world. So the intersection was cut out of the old cramped layout and then spliced into the spacious real estate of the new 4'6"x4'6" layout. 

Then, the mainline finally began advancing forward. Soon it made a right turn, then another right, and maybe even another! Then reconnected to the intersection. Route 1 is in baby! So you know what that means...
Time to put a car on the track and take her for a spin! Yeah, sure its "roundy roundy". But after all this time were finally rolling! I'll take "roundy roundy" over "display, display" any day. And when it does finally get old, well...

With the mainline continually advancing forward it wasn't long until all four blocks were in. Now the cars can dance the "Cloverleaf", the "Double Untwisted Figure 8s", or even 4 simultaneous "Roundy Roundys" and everything in between!
Pretty neat, eh? Yes sir! Pretty darn neat!

Dandy

Monday, June 24, 2013

Yous Young Punks Has it Easy!

Building a Grand Junction Intersection is a lot easier these days than it was when I was a kid.

Here are some old construction photos from that hot summer way back in 1984 when I built that intersection:

 Each rail had to be cut and shaped and then spiked into place. Checked with a track gauge. Adjustments made. Checked again. And then tested with a car.


Running rail is Code 83 and the simulated channel rail is Code 70. They were spaced with a straight pin and spiked together with track spikes.

Fortunately, even though this represents some of the very first track I ever hand laid, careful construction and the liberal use of the NMRA track gauge, the trackwork holds up to this day (some 30 freakin' years later!).

But now!:

Building such intricate track work has become a lot easier now with premade castings from such suppliers as Custom Traxx and Proto87.

Andy Reichert was able to piece this special track work rather together quickly using his "Electric Avenue Easy Track System".

Here I spent all those years building something I thought would be very unique, and now any ol' Dandy off the street can build it. Yes sir! Any ol' Dandy can build it!

Dandy
.

Tuesday, June 18, 2013

Spaghetti Bowl

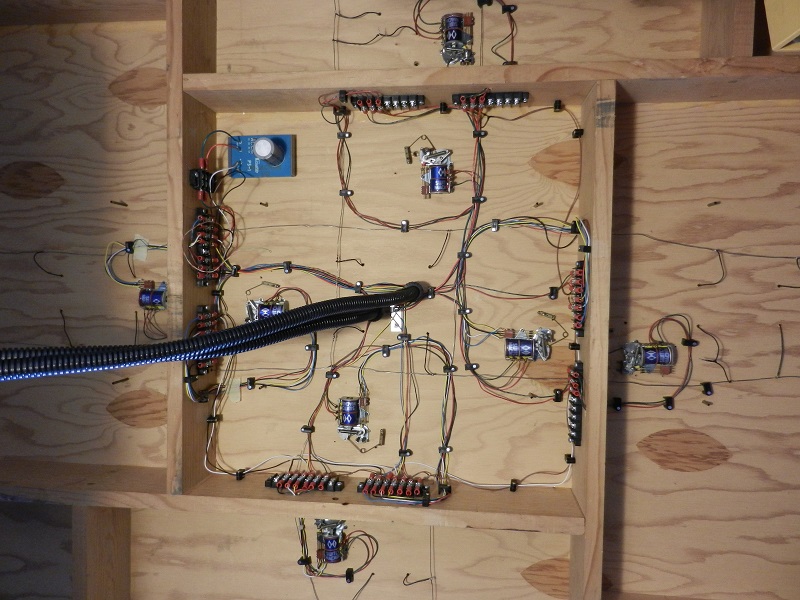
Wiring up Turnout Machines

I installed these NJ International Turnout Machines years ago. But I find it very difficult to get the tabs for the control panel indication lights arranged just right so they don't short everything out. So I have foregone the indication lighting aspect of it for now and hooked them up to just switch the track. In the upper left is a Capacitive Discharge Unit from Miniatronics to give the turnouts a strong, decisive "snap"!

Eventually I would like to replace all the switch machines with easy to install and adjust micro servos.

The reason I haven't gone that route yet is because I don't want to invest another dollar into this layout until I see the intersection work as designed first! Yes sir! I want to see that intersection work as designed first!

Dandy

Monday, June 10, 2013

A Helpful Thread on Overhead Construction

The Free Rails site (one of the very few model railroading forums to include traction modeling) has a helpful thread covering overhead construction:


 Photo: Herb Kephart

Check it out. Every little bit helps, right? Yes sir! Every little bit helps!

Dandy

Monday, June 03, 2013

Faux News Everyone!

The Southern California Traction Club is featured in a Fox 11 newscast:


Tony Valdez saw the video I made of the club and wanted to use it for his broadcast. So you'll recognize a lot of the model trolley shots from that video. He includes some nice interviews with club members. Overall it's a neat little expose' on the club. Yes sir! A neat little expose'!

Dandy

Monday, May 27, 2013

The Grand Plan!

Finally! The mysterious, top secret, hush hush, track plan finally revealed!

Judging by all the comments, emails, cards and letters we haven't received, yous guys aren't exactly dying of curiosity about the track plan of this dandy little pike! So without any further ado, here you go anyway:

Ta-Da!
Four city blocks of downtown traction action, featuring a Grand Union (or Grand Junction) intersection, all contained within a 4 1/2 x 4 1/2 foot layout. So whaddaya think? Worth the wait? Hmm? Yes sir! Worth the wait!

Dandy


Monday, May 20, 2013

Say Mister! Ain't You Forgetting Something?

I know what your thinking: "One minute your building cars, the next your installing the overhead. What happened to laying track?!"

     Well, the truth is, this layout was begun years ago (decades actually!). And as it turned out, traction modeling is not an entry level endeavor. The basics of model railroading should be mastered before delving into traction. So the layout languished in storage for well over a decade before conditions were right to dig it out, dust it off, and pick up again.

Historical photo from the time of no color. Brass car, lead folk, white plaster. We've come a short way over a long period of time! Photo circa 1988 Dan D. Sparks.

The track work was done way back then. So to help fill in this "track gap", I was able to locate some old construction prints. So in between wrapping wires and repairing poles and fine tuning track, I will scan some of these and post them for your eyeballs to devour. Yes sir! Post some old layout construction photos for your eyeballs to devour!

Dandy

Monday, May 13, 2013

Can't See the Layout for the Poles!

Line poles have been procured and planted perfectly in their proper positions permanently ready to provide proper support for the overhead as per the Proclamation :P .

1890's street runs from the lower left along the edge of the layout, intersecting with 1910s street in the center. This photo only reveals just half the poles on the layout! Its a forest of poles!

I thought I was done constructing poles until I saw this photo. Photos reveal a lot more than I would see with just me nekkid eye. The bracket arms were too long on those telephone poles, so I trimmed them down to a more reasonable length.
So now, finally, we are ready for overhead. Yes sir! Ready to string that overhead!

Dandy

Monday, May 06, 2013

Wrappers Delight


Wire wrapping - got to love it!

This cross span on 1890s street consists of four wire wrappings. One at each pole and two more at the hanger. The wheelsets with the pointer help me locate the hanger position to the correct height and centering over the track.

The technique I'm using to install the overhead for my layout pretty much follows the technique detailed at the Trolleyville site: Hanging Simple Overhead Wire For Trolley Pole Use. I deviated a bit with the type of wire though:


Phosphor Bronze is a very good conductor of electrisicles, but there are some drawbacks with using this wire. Its more difficult to work with compared to magnet wire. Magnet wire is more flexible while the Phosphor Bronze is pretty stiff and easily penetrates the skin (my layout has literally been built with my sweat and blood!). Its tiny diameter looks real good, but hopefully this won't be an issue with carrying the DCC signals.

Nickel silver wire will be used for the contact wire since nickel silver is a very good material for transferring the electrisicles (just like nickel silver rails!).

I have also foregone the insulators for now, I have an innovative idea that I want to try out for that in the near future.

Alright, well... that's enough bloggerin' for now, I have a lot of wire wrapping to do. Yes sir! I have a LOT of wire wrapping to do.

Dandy

Sunday, April 28, 2013

One Down! 999 to go!

The installation of the overhead has begun and shall proceed in earnest!

The first of many, many wire wraps.

Now that all the line poles are placed (which, by the way, fulfills one of the parameters of my New Years Resolution) the stringing of the overhead wires may commence. Yes sir! The stringing has commenced!

Dandy

Monday, April 22, 2013

I Thought Brass was Brass

But there is such a thing as "Soft Brass".

As it turns out, soft brass is totally unacceptable for use as line poles. 
And that's all I have to say about that. Yes sir. That is all I have to say about that!

Dandy

Monday, April 15, 2013

Simple, Stately, Line Poles

Getting very anxious to get the layout running again, I have fabricated a whole new batch of line poles.

Having the streets right on the edge of the layout means that the other sidewalk isn't there to plant the second span pole.  So my poles were originally built with these bracket arms:

But the tension of the overhead proved to be too great for the poles on the street corners and these bracket arms had a tendency to suddenly bend 90 degrees, ruining the pole. So I have decided to bite the bullet and add span poles along the edge of the layout.

These square milled line poles were very common pre-20th century.  Eventually they figured out that milled poles were more expensive to build and that un-milled poles are actually much stronger. So they fell out of favor fast and seem to be all but completely gone by the 1920s. I think that these square poles are actually quite handsome, you know, for a pole. So my 1890s and 1900s streets will sport these nifty poles.

 I fabricated my poles from solid 1/8" square brass stock. After I had painted and weathered them, I was won over by the Southern California Traction clubs practice of adding "eye-bolts" to their poles. Should my permanently attached span wire bend or break, I would be faced with some major repair. But seeing the ease at which the SCTC could swap out their span wire with this "eye bolt" method, well its obvious which method is superior. Yes sir, its obvious.

SCTC member, John McWhirter, posted a sketch on a Yahoo traction modeling group that depicts an effective method of adding "eye bolts" to line poles that I followed to fabricate my own. Basically its looping span wire around a track nail and then threading the ends thru a hole drilled thru the pole. The ends are bent to hold it in place for soldering. Then trimmed flush.

Here are my poles with their new eye-bolts installed. The soldering ruined the paint job near the bolts so I have some touching up to do before the poles can be installed on the layout.

Here is the first pole to be installed on the layout. Notice that the new eye-bolt isn't overly huge and helps the pole maintain its simple, stately elegance, you know, for a line pole. Yes sir! Simple, stately elegance, for a line pole!

Dandy

Monday, April 08, 2013

Tarnation Supply Warehouse

Building a Good Ol' Fashioned DPM Style Model for an Upcoming Project.

A bit of a diversion, how good does it feel to build one of these type of models again! Its been years for me!

The idea is to butt two of these "Schultz Garage" by Woodland Scenics models together to build a larger building...

Like this! They went together easily enough... except where the cement overflowed and dissolved some of the brickwork on the nearest corner. No worries! I'll think of something to hide that. The back of the facades don't have any detail, so since I have some left over wall material...

Sweet! This beefs up the wall and adds some more detail to the building.

I want a good old fashioned red brick color for the building. A lot of guys are using Americana craft acrylics for these sort of projects, so I thought I would give it a try. I went to my local Micheal's crafts store to get a bottle of "Americana Heritage Brick", but of course they were out, so I got the next closest thing, "Rookwood Red" with "Fawn" as the trim color. It doesn't really matter what color I get anyway, weathering will alter these colors dramatically.

See? Just adding a mortar mix already changed the color quite a bit. For the mortar I just rubbed on some Durhams water putty tinted to a light grey into the cast-in mortar joints. The building looks quiet stark this way, so its going to need to be toned down.

I gave the building a weathering wash which really toned things down and really brought out the detail (including the melted brick smudge on the near corner!). Most folks use an India Ink / Alcohol mixture for this, but I prefer a Bragdons Weathering Powders / Alcohol mix. It gives me a more dusty and dry look that I like for my Southern California set buildings.

For the windows and doors I used the same "Fawn" trim color.

And they were cemented into place. I'm thinking of doing something different for the freight door, so I skipped it for now.

There is a popular technique among craftsman where paper signs are sanded tissue thin so when applied to the side of a brick building they look painted on. So I thought I would give it a try. Its pretty tough to do and when my sign finally ripped, I stopped and glued them on. But I think it was too soon, they still look kind of thick.

I have some doors left over, so I thought I would experiment and see if I can make one look partially open...

I carefully cut out an opening and then filed it smooth up to the door frame.


The new freight door was painted and installed.

 Then the doors and windows received the same weathering powder / alcohol mix that the bricks did. Look how it really brings out the details. But now with that open door, I'll need some interior detailing.

With the last of the leftover wall material, I cemented them together to make an interior office space. I hate to waste, so this makes me happy.

So easy and effective.

The roof was constructed as per the instructions, but with longer pieces of styrene. But I'm not entirely happy with the plain roof, I mean, what kind of roofing material is that supposed to be anyway? So...

 A scale 3' strips of 600 grit sandpaper was cut and glued to the roof to simulate tar paper.


The "tar paper" was weathered with the Bragdon Weathering Powders.

Also of note is how thick the windows and doors are. The model comes with clear styrene to fit behind them, but I think it will just highlight that thickness. So...

 I've experimented with using Micro Kristal Kleer for windows in the past and wasn't too impressed, But for an industrial building like this, I think it might just be perfect! And it fits IN the window openings, not behind them. Its messy work, so it was applied from the back of the windows.

Micro Kristal Klear goes on white, but will dry clear. Being IN the window frames, this should help the window frames look thinner.

And there ya go! I'll come up with something to hide the melted brick thing when this building is put into its scene. But until then, this has been a fun little diversion. Yes sir! A fun little diversion indeed!

Dandy